
This Tool Can Fix ANY Underexposed Shot - No Exceptions!! DaVinci Resolve
What’s going on everyone and welcome back to yet another one. Today we are going to be talking about the tool that can fix ANY under-exposed shot, with no exceptions. I use this tool on my professional projects all the time. So let’s get into it.
Now because this isn’t a look tutorial, I’m going to start with our rec.709 and I simply converted this from RED LOG to DaVinci Wide Gamut, and then from DaVinci Wide Gamut to rec.709.


Once we do that, we are left with our rec.709 image.
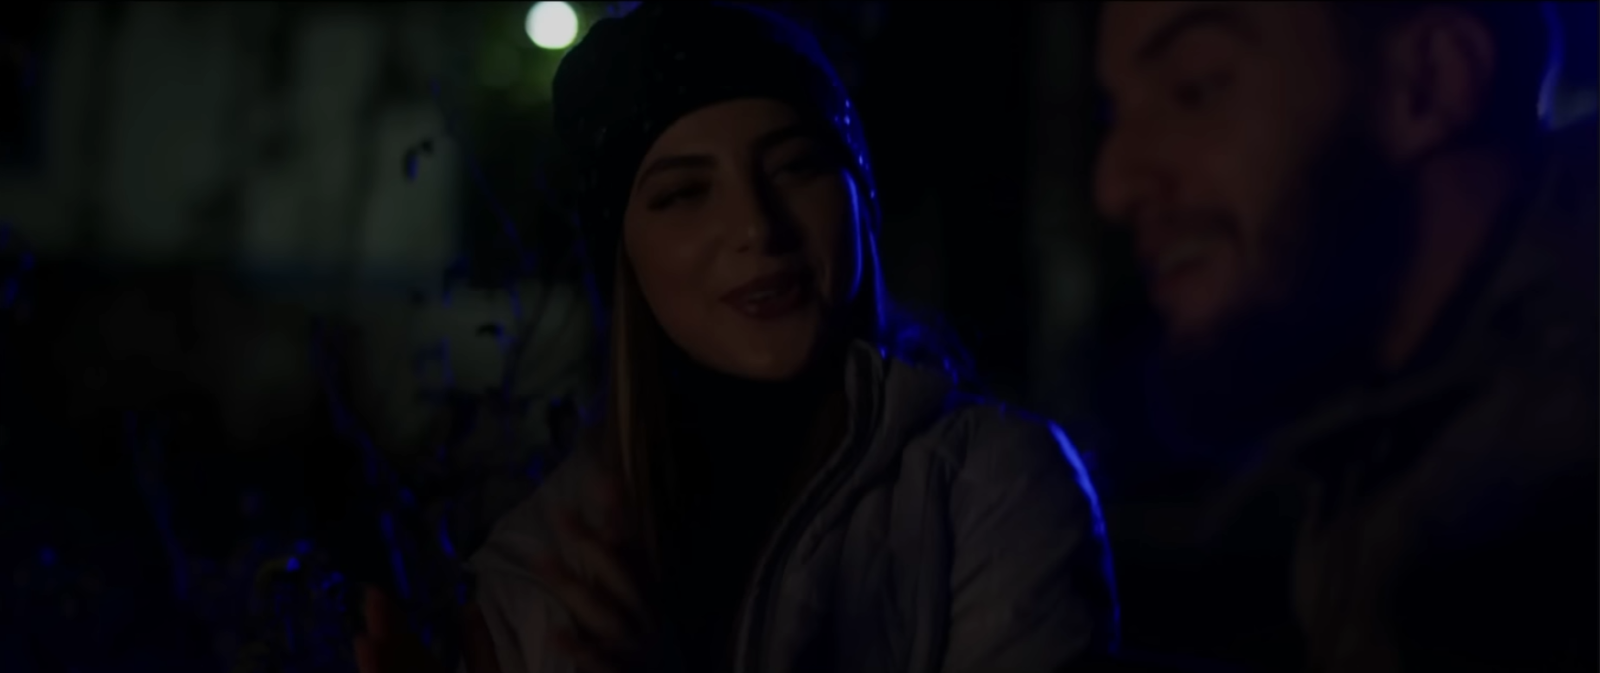
So on my balance node, I went ahead and pushed it up 3 stops using the HDR palette, global offset.


I actually went over a bit, just to show you how crazy this tool is. Then I went into my primaries to pull back the contrast a tiny bit. Now this is the result we get.

From there I added another node and went in to dial in my look. With my custom s curve, we created a good exposure curve. It also helped clean up some of that unwanted noise we were getting.

But the biggest hero was the HSL curves.

We went into hue vs saturation and basically tried to kill a lot of the blue that you can see in the image. Then we shifted some hues using hue vs hue.

Now this is where we are.

Now, to get rid of all that noise and gunk we don’t want, we are going to use the built in noise reduction from DaVinci Resolve, to see how good it is. Now you want to use this noise reduction before any nodes in the node tree. Why? Because you want to use it on the most raw point possible. So I am going to add another node prior to my IDT.

Now we are going to use these settings for the noise reduction.
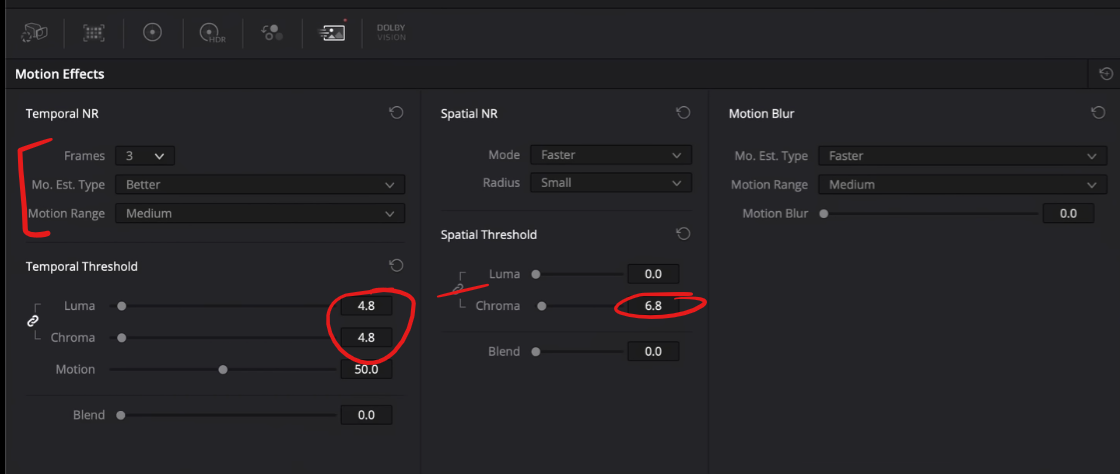

You can see here, it’s doing a pretty good job with these settings. However, when we scroll over to the out of focus dude, you can see it’s not perfect. It has this patchy artificating. This is something to be aware of.

One known problem is that Resolve’s noise reduction can soften areas in your image.
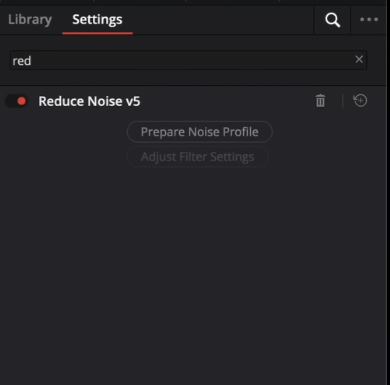
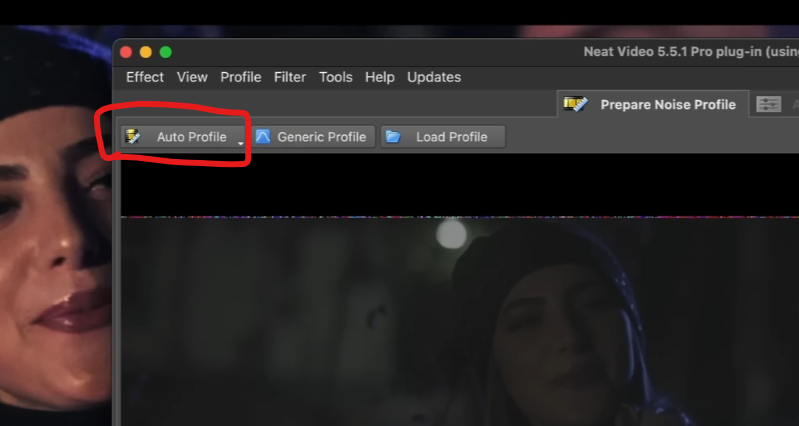
Now I am going to save this version as a still, and we are going to use a plug-in called Reduce Noise v5. This is the end all-be-all. It’s NEAT video, and I’ve been using it since 2012. With this, all you have to do is click the prepare noise profile button and it opens this pop-up window.

This is so smart that once I hit auto profile, it will find the worst area and try to fix it.
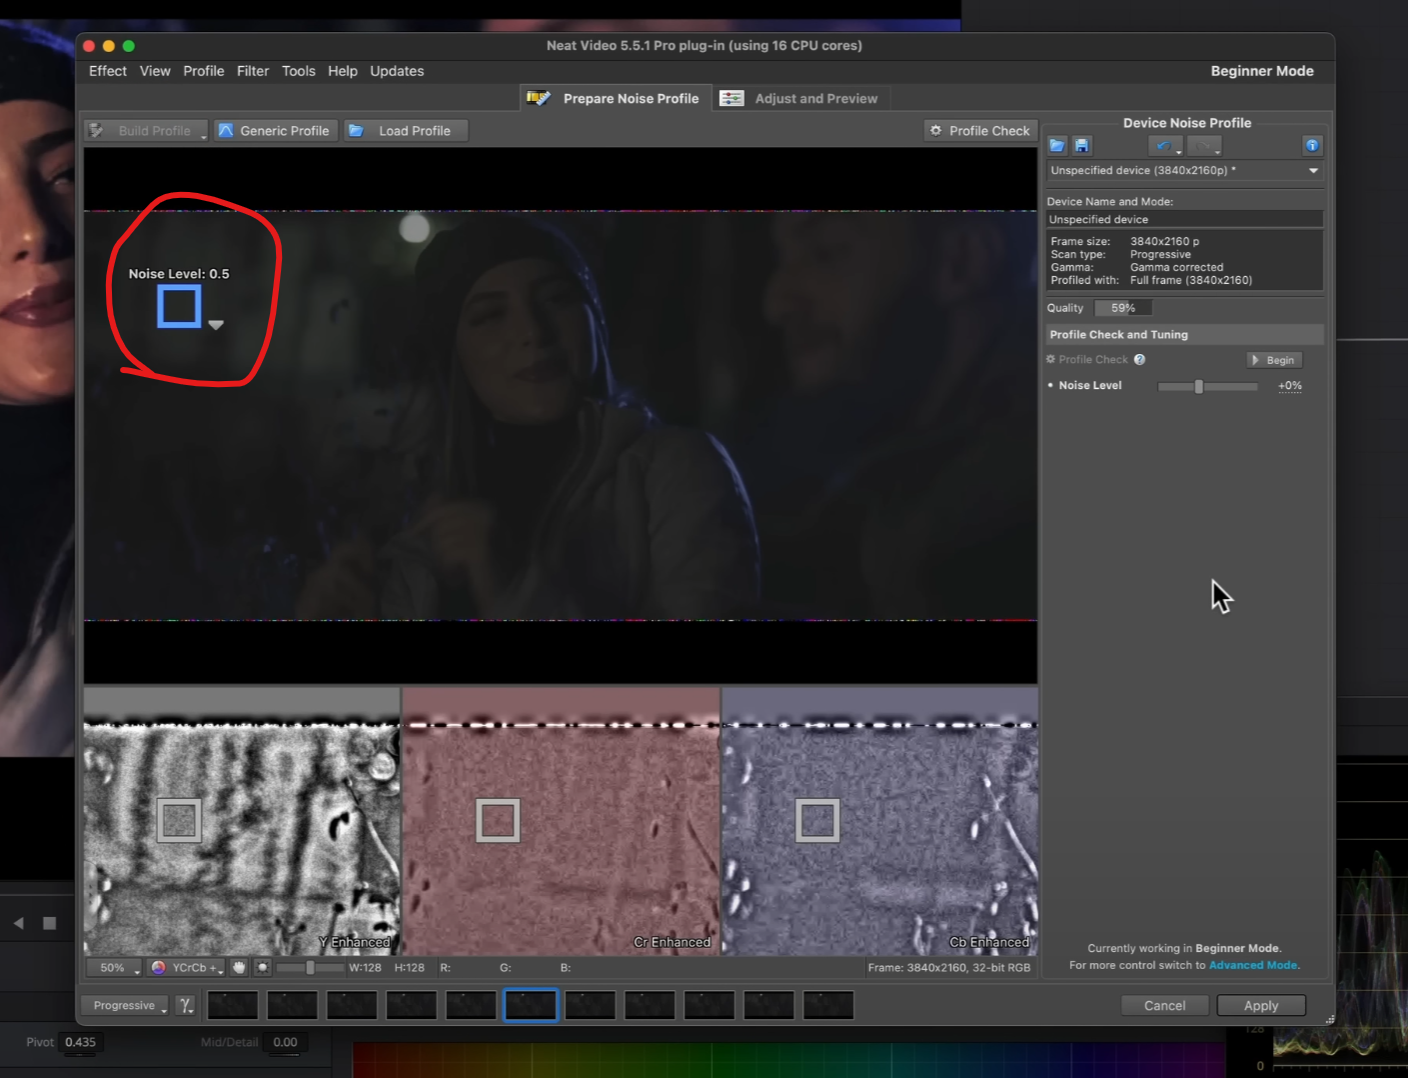
Then you will hit apply in the bottom corner. Now look at the results.
Here is the before:

Here is the after:
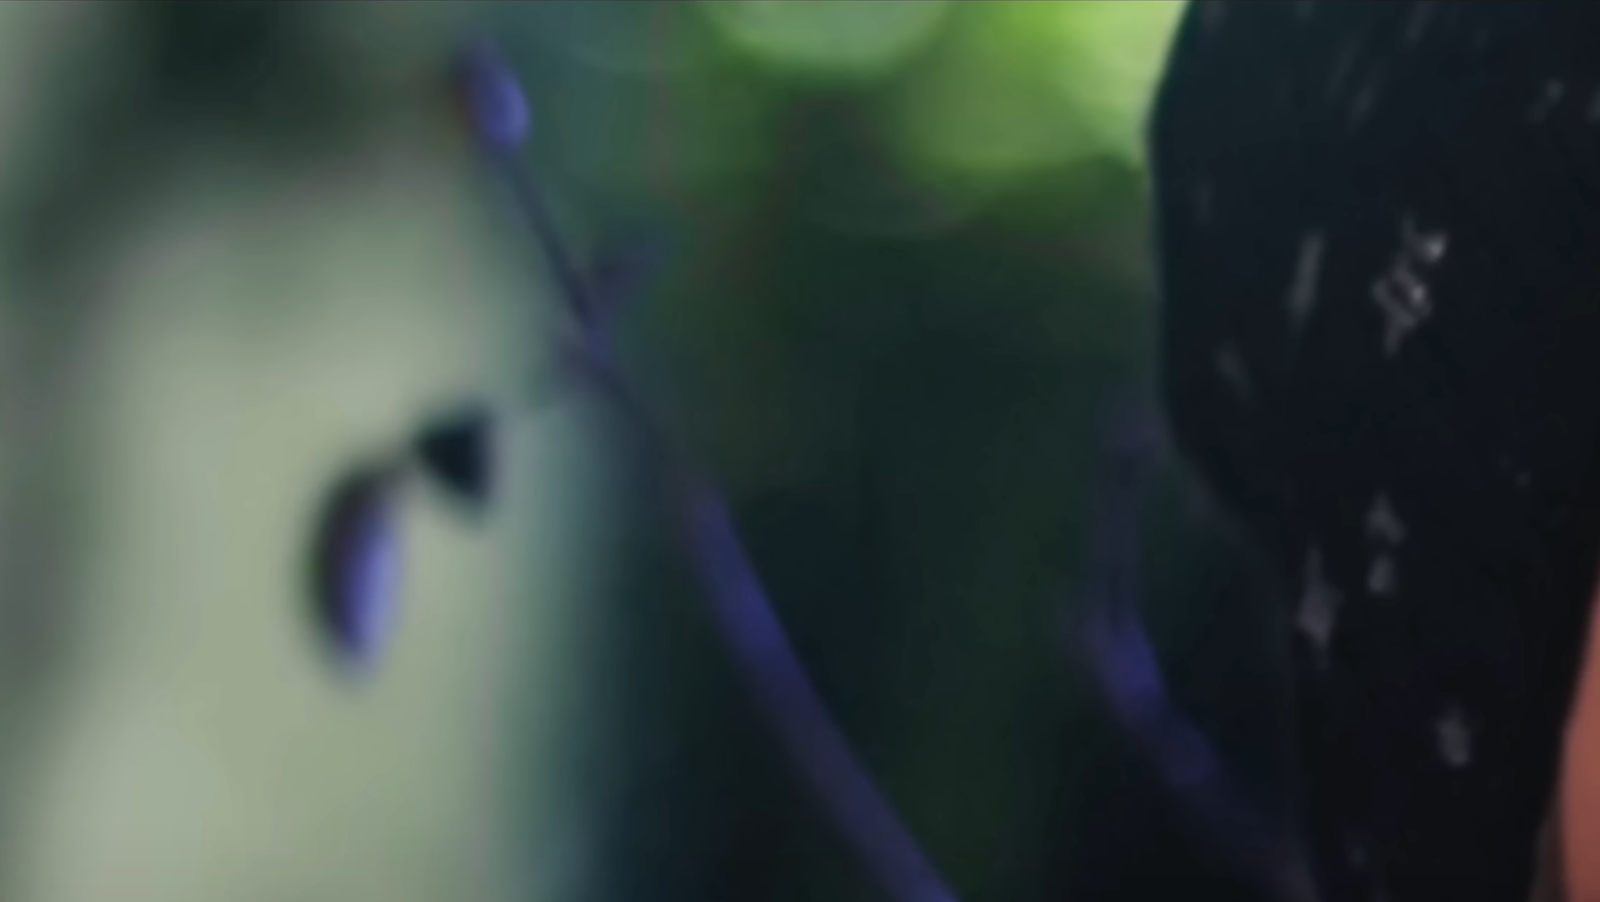
And here is the Resolve Noise Reduction:

If you can see, the black hat has lost some detail and it’s a bit soft. NEAT leaves the sharpness.
Now if NEAT does too much, you can go to the node key and turn down the key output.

Now I personally don’t love this method, so I leave everything as is, then I go in and add another node before my ODT and add some film grain onto the image. I use the preset 35mm 400T.


Now some may wonder why you would clean up your image, just to add grain back into it and the reason is
Monochromatic grain is very different from noise. Noise lives in the RGB channels and that’s what makes your image look gunky and dirty and digital, whereas monochromatic grain adds texture to your footage and makes it look more film-like.
If we are looking at the difference between NEAT and the built in DaVinci noise reduction, then NEAT left the sharpness intact while cleaning up the entire image. The built in noise reduction softened it by adding a smear effect and still left a bit of noise.
Now the only caveat using NEAT, is this…

We are getting very slow playback compared to the built in noise reduction. And you all know my machine is maxed out and it’s still choking which tells you the software is not optimized, at least for Mac. But I do feel the sacrifice is worth the result because it will make all the difference in the world.

There you have it. My favorite noise reduction plug-in. With that, work hard, get obsessed and get possessed and I will see you in the next one!
MORE LIKE THIS


