
Can you get Hollywood looks with the Panasonic GH6?
You all have been asking me to do tutorials with prosumer level cameras, and today we have this amazing video on the Panasonic GH6! We are going to make it sing and see how far we can push it. We are going to try and crack the footage and pull it back. The footage today was provided by a good friend, Jeremy Pope-Levison who is a freelance DP in Dallas.

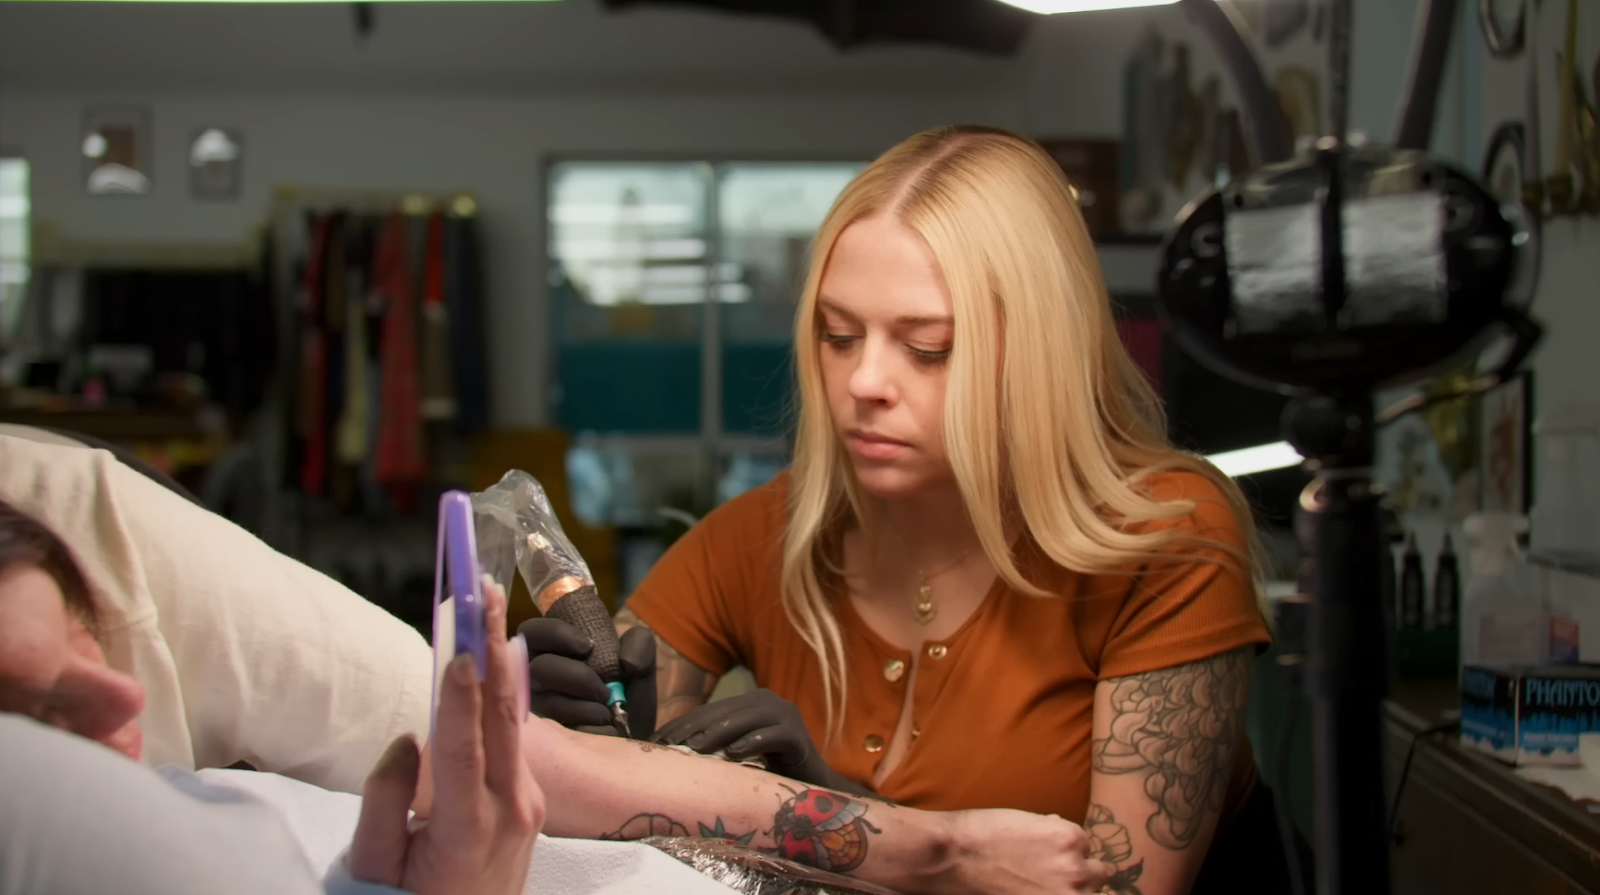
Okay, now we are inside Resolve and here is the shot we are working with.

Since this is a static shot, there is no need to define a hero frame, so this will be our hero frame. Now taking a look at the waveform, everything is shot really well. It’s sitting right in the middle so it should be a good shot.

The reason I picked this image is that it will be a great test for the dynamic range in the image. You can see the spotlight that is hitting her, so it’ll be a challenge because on paper the GH6 is a prosumer level camera and not a cinema camera, so we have some outside the window, lights in the image, and how much can we work with her skin.
We are going to build our node tree as we go, but we are going to throw things at this image to see how much push and pull we can do. But first let's checkout our project settings.

I like using DaVinci Wide Gamut because we will be using some of the tools that are color space aware, so they will work great. We are going to start by creating a DaVinci Wide Gamut sandwich with color space transform. Our first node will be the VLOG to DWG.

Then our last node will be the conversion from DWG to rec.709/gamma 2.4.

So now our footage is properly converted from log to rec.709. You can already see that we are looking good, but there is definitely a bit of push to the image and I find that’s how it looks after a CST conversion with VLOG.

This is great for run and gun, wedding films, low budget stuff, etc. because you can just drop this off and make a few tweaks and run with it. But as colorists, this is just a base for us. Rec.709 is never the final look. With this shot it’s locking you in and cornering you with how it’s pushed it from the start. So we are going to have to actually dial it back first. With this camera it seemed like Panasonic dialed in the color for low budget people who want to print it out of camera, or don’t have the time/skill to work with it.
In our first node, we are going to start by lifting up the lift, then dropping down the gamma to make sure her skin sits in a good spot. Doing this gets a lot of information back.


So already it’s looking so much better.
I do want to go into my last node to create an s curve to add some pop without crushing the image.

This helps add a bit of dimension around her face, giving us a nice subtle contrast that helps the image out, while not hurting our shadows or highlights. There’s even a color pop coming in.

Now I want to go to my fourth node and I want to qualify the skintones. So when we click on the skin, here is what we get at first.


Now I am going to limit the parameters and try to focus it more on the skin.


Now what do I want to do? I am going to pull back the saturation a bit to give it this bleach bypass film-ish look. But not going too crazy.


Just taking off the digital look that comes with prosumer level cameras.
Now we are going to create an outside node, which is done by right clicking on the node and adding an outside node.

In here I want to use my printer lights (offset wheel), and I’m going to add +1 green.


This adds a nice green layer to the background and because her skin is protected, it leaves that alone.
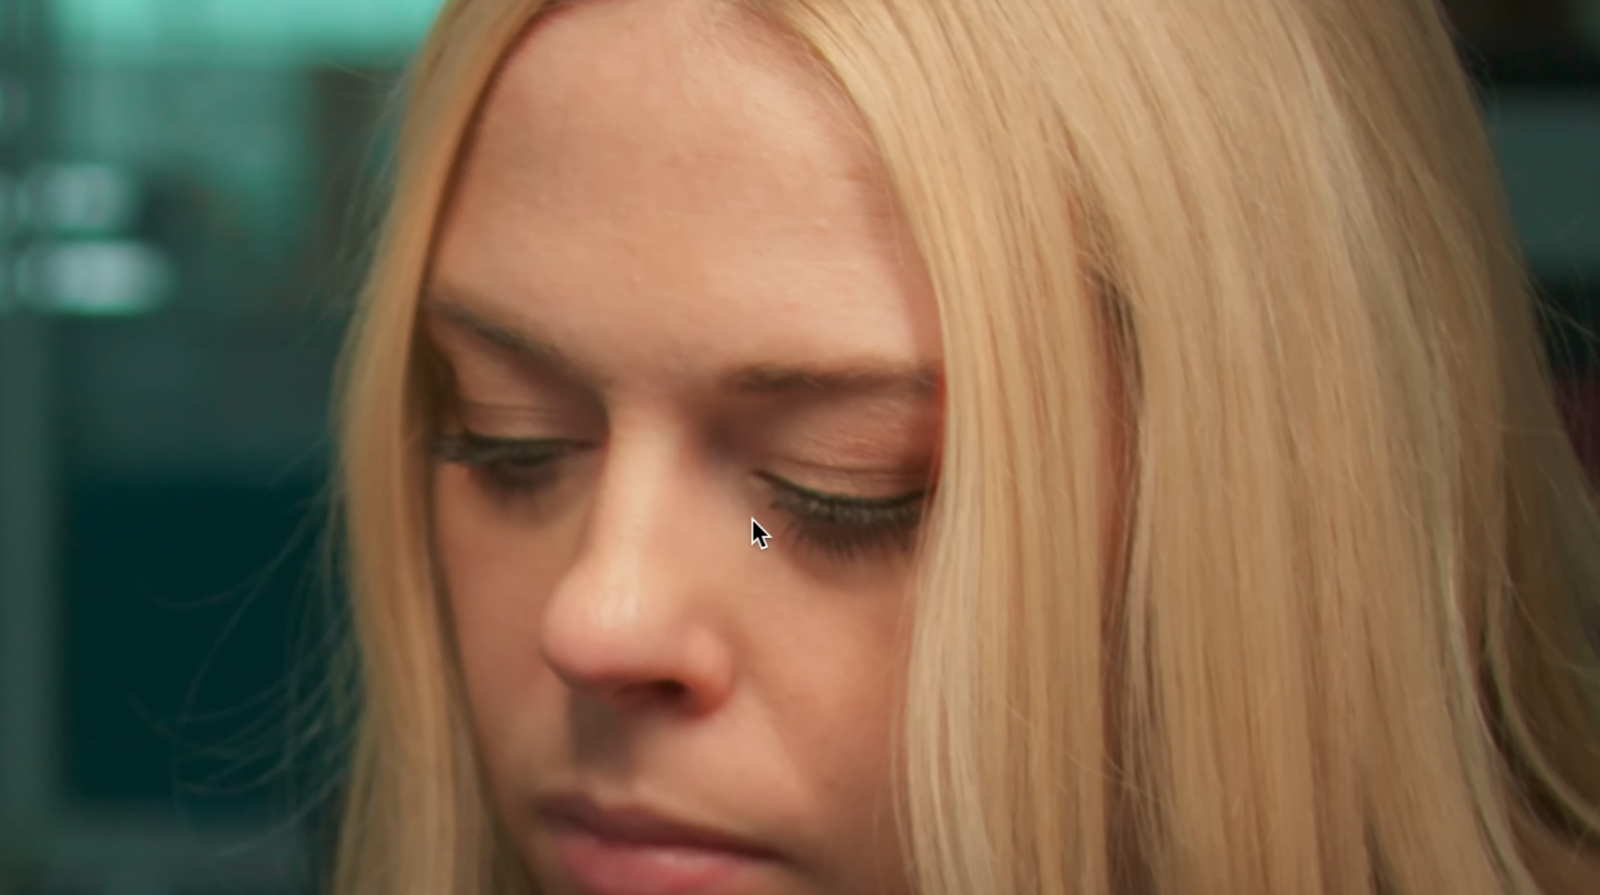
Now going back to the skin node, I am going to pull back on the gamma to drop her skin tone exposure and then drop the midtone detail to help soften/smooth out the face a bit.


One more thing in the skin node, I am going to use hue vs hue and click on her skin and add a bit more warmth into it.


It’s all about making these super small changes that are hard to see online, yet makes all the difference.
The next part I want to attack is on the arm of the client. You can see all this magenta, which could be her skin, but it’s distracting and we need to get rid of it.

So we are going to use our color warper. Why am I using this instead of hue vs hue? Because I want to use new tools to see if I can break the image and if I do, then I’ll pull it back and know what the limits are.


This is doing a lot. I don’t want to go any further. Staying in this node I want to try something a bit crazy. I am going to switch the settings to have a 3-point lock and then I want to grab the background color and crank it and see what happens.


I’m impressed with how well this holds up. I thought for sure it would break, but it’s really holding up. The beautiful thing about this is if it is too green, we can start swinging it and cool it off to make it a bit more cyan.


Now looking at rec.709 vs our grade, someone may like the pop that was created with the rec.709. So one thing I want to do is go under my shadows slider and bring it up to bring that information back. Then, I will swing the highlights slider down a bit to counteract what it was doing with her skin.
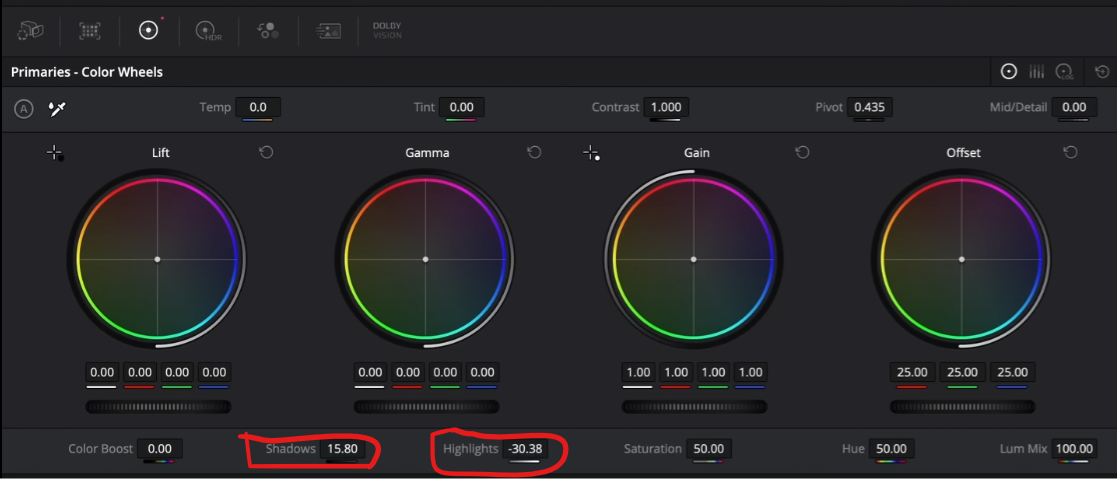

This change is good. It’s almost like we are buying dynamic range. We were able to bring in more information into the shadows, while keeping the highlights at bay. Even the outside window is looking great. This is looking a lot more cinematic now.
I want to go back to my custom curve and try to mess with it a bit more. I’m going to raise the top-end a bit.

This custom curve just makes things pop out.
Now the last thing I am going to do is give this some texture. I am going to use my halation node. When you first drop it on, it looks awful. So I am going to pull back the threshold until we have a good look.

What I don’t like is this action happening on the shirt of the client.

What I am going to do is go back into the settings, and I’m going to turn on fine tune relative spread, then take out the green a bit. Then I am going to pull down the spread a bit.


We just want it very subtle, but still there. It won’t punch you in the face but it’ll look cool and cinematic. Then I want to turn on the grain, but dial everything down to half.


You can see it adds this nice film texture.
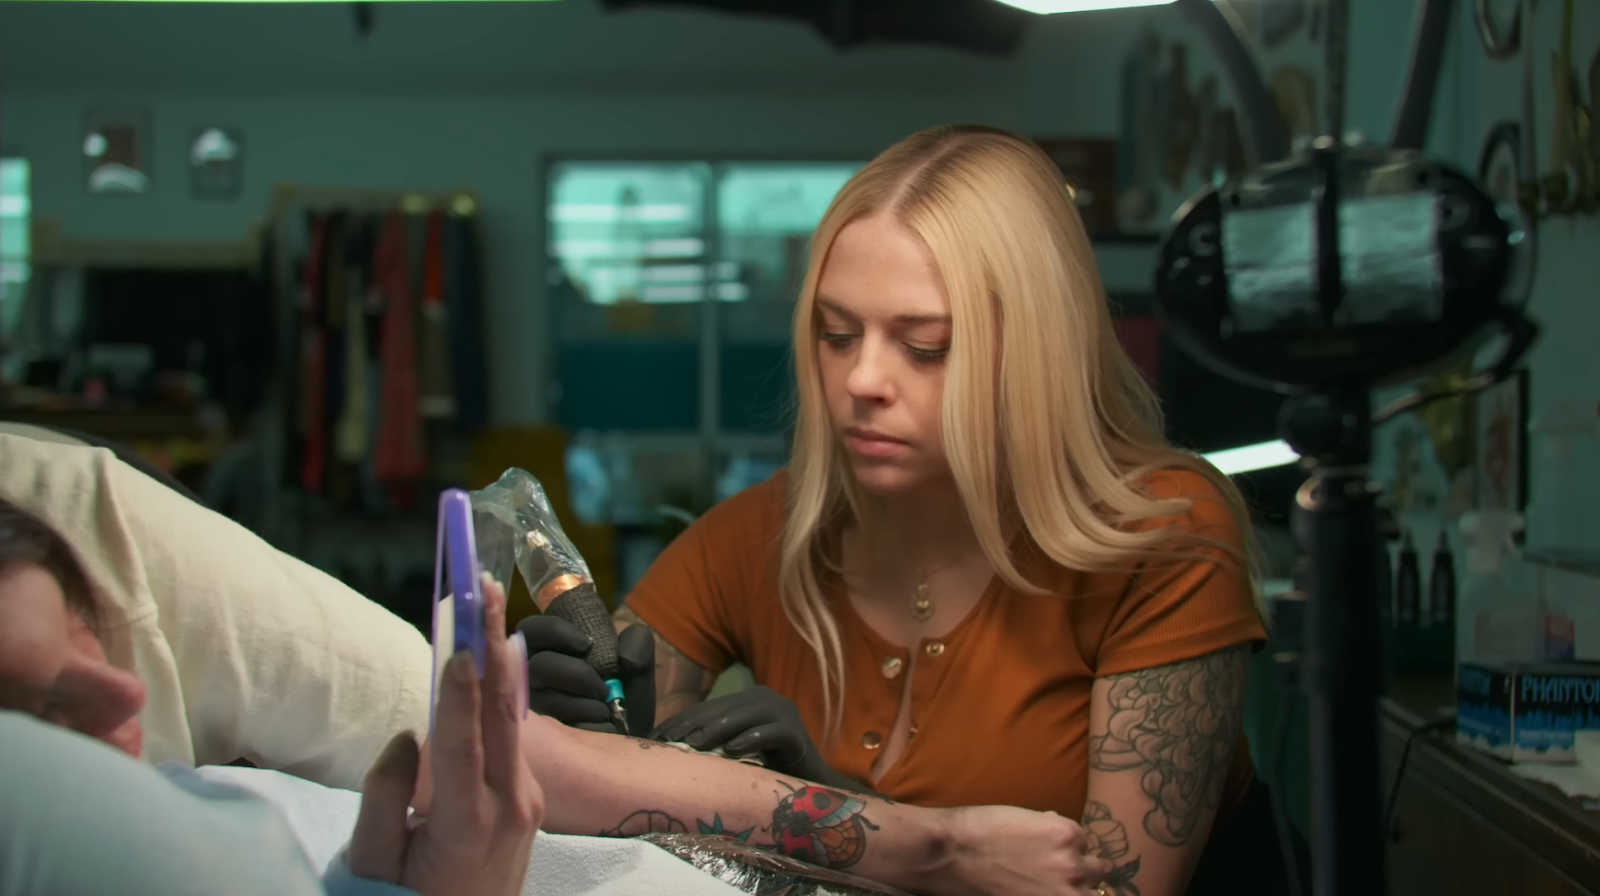
Now when we play it through everything holds up. There is no chatter from our key, it all looks good. So let’s view this final look in full screen.

Wow, I am SUPER impressed. How far we pushed it, how well it handled what we threw at it, and I didn’t see any noise. I didn’t see any issues with a specific channel, and on my C500 the red channel was GONE. So man, this camera can handle a lot. With that, work hard, get obsessed, get possessed, and I’ll see you in the next one!
MORE LIKE THIS


