
3 Key Uses of the GLOW FX in Resolve
Alright, so this video is showing you 3 completely different ways to use the glow FX in resolve. Now the looks are already created because I wanted to focus on the real agenda for the video.
So here is the shot we are working with.

Okay, so now we know what we are working with. We are going to throw in the effect and start to mess around. But the way I can help you most is to say this:
Go in with the mindset of a 5-year old. What do I mean? What I mean is to just start going nuts and playing around with parameters so that you can understand more of what’s going on.
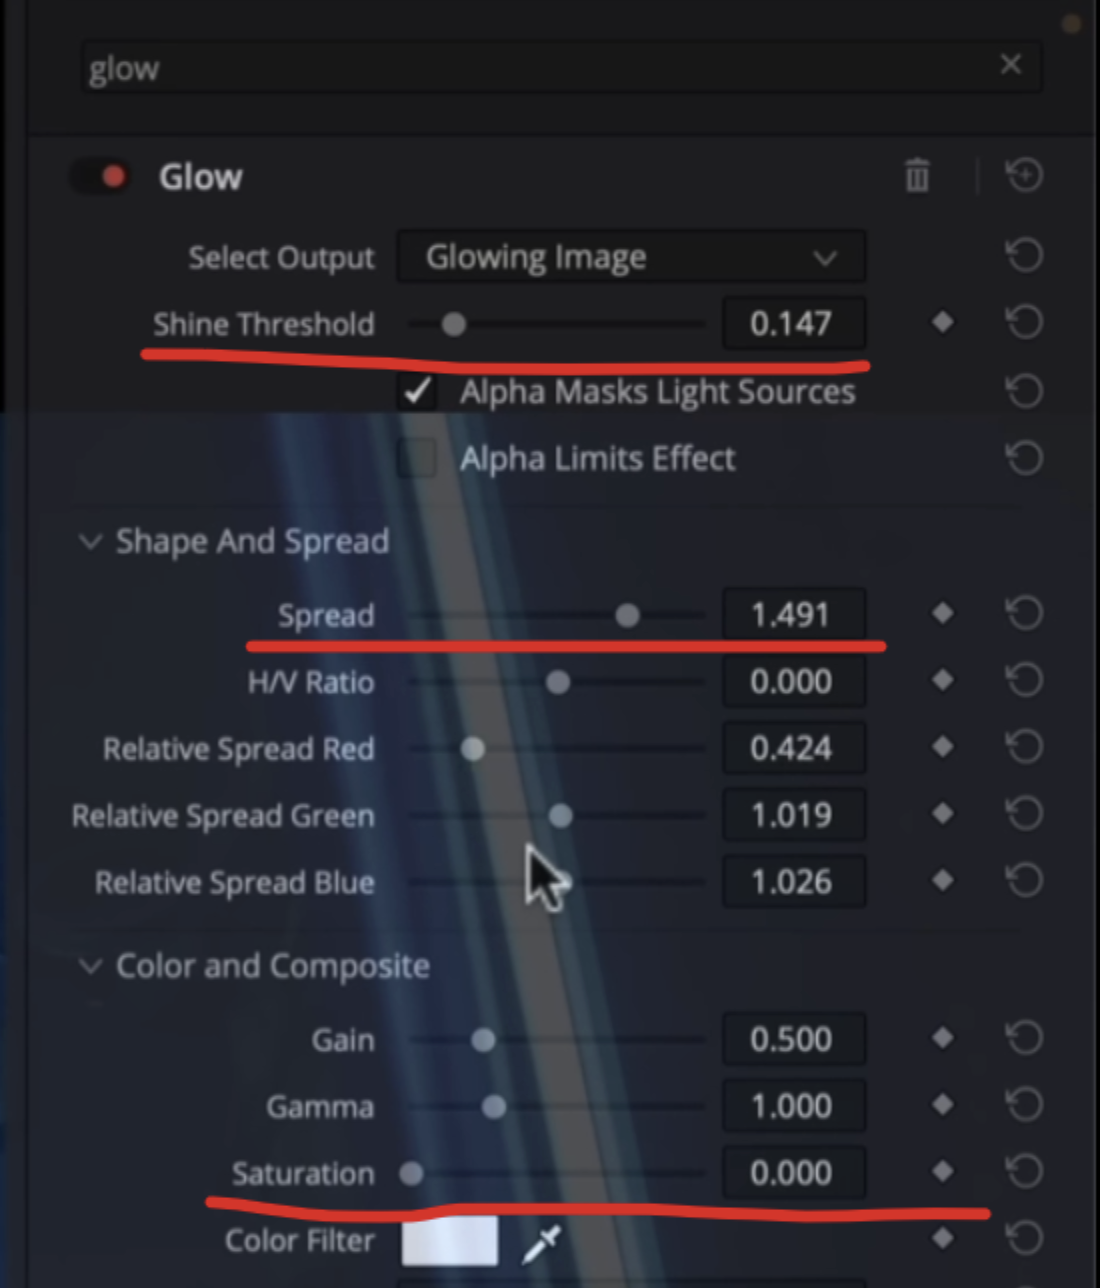
We are going to go a bit extreme and bring the shine threshold back and then move my spread a bit. Then we are going to mess with the H/V ratio a bit. This moves the streaks horizontal and vertical. If you want to see more, reference the video above.
Now that we’ve played around with these, let’s go ahead and set it. The thing we need to ask ourselves is: what’s the purpose? What I wanted to do is remove the digital feel that this shot has. I wanted more of a bloom that you get with film. I also want to remove the saturation that is being brought into the shot that we are seeing.
Then from there I want to change the blend mode from normal to screen. In the video you’ll see more, but we are going to settle on screen.


Now when I mess with the relative spreads now that there is no saturation, it starts to add more of a blur. What I am going to do is mess around with my relative spreads to mess around with it and dial in the artistic characteristics.


The brightness is a bit harsh, so we are going to go into the bright region recovery and mess with that parameter.


This is the first way that I would use the glow effect. So let’s jump into the next one.
Here is our next shot with our look created.

So what I want to do with this one, is I want to beautify it a bit. So we are going to start by changing our composite type to softlight, which will darken the image, but don’t freak out.


To get that brightness back we will go into our shine threshold and crank it back quite a bit.

Now I want to go under the spread and bring it back.

Then I am also going to drop the saturation it’s adding too because I feel like it’s doing too much.

We wanted to decrease the saturation as well to mess with the RGB channels, to add more blur to this glow.

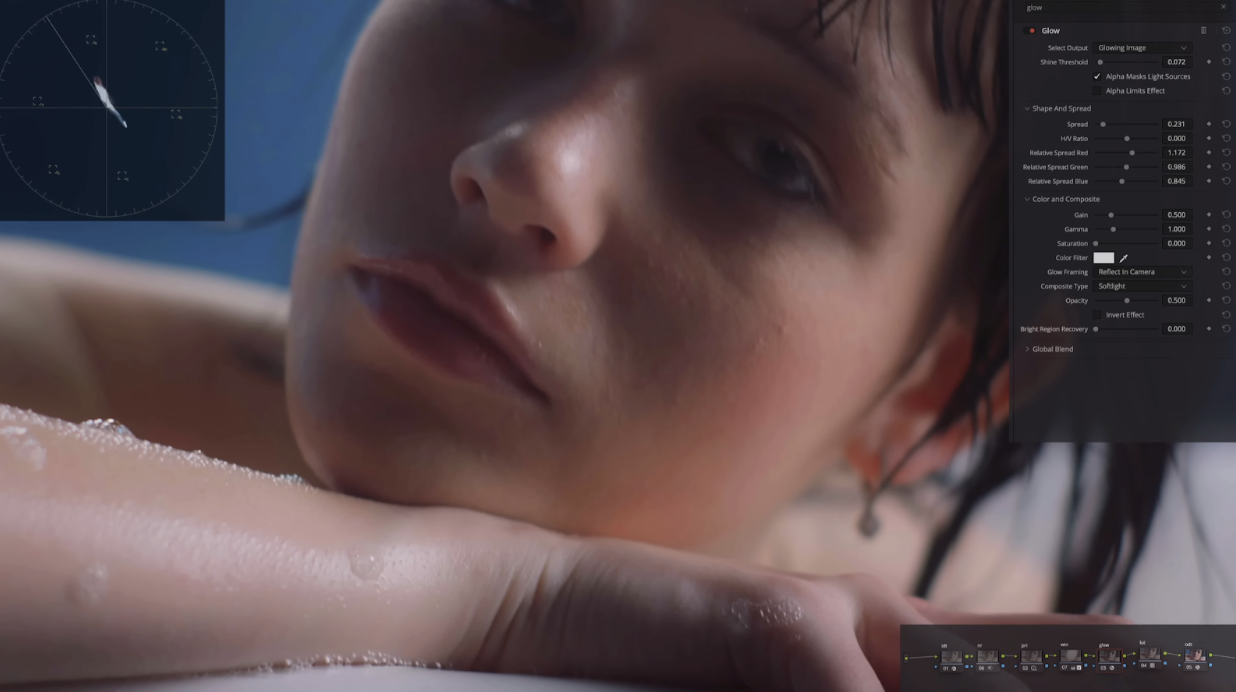
All of the areas are so much softer and it brings everything together and accentuates everything in the frame.
Now the third way to do this, we have our shot here:

Now we are going to again change the blend mode to softlight.


Even just by adding that, everything comes to life and just makes it look great. But let’s say I just want to affect the highlight and clouds, not our shadow area. What we can do is simply check the alpha limits effect, go into our qualifier, and select only the bottom part.


We can pull back on our key though.

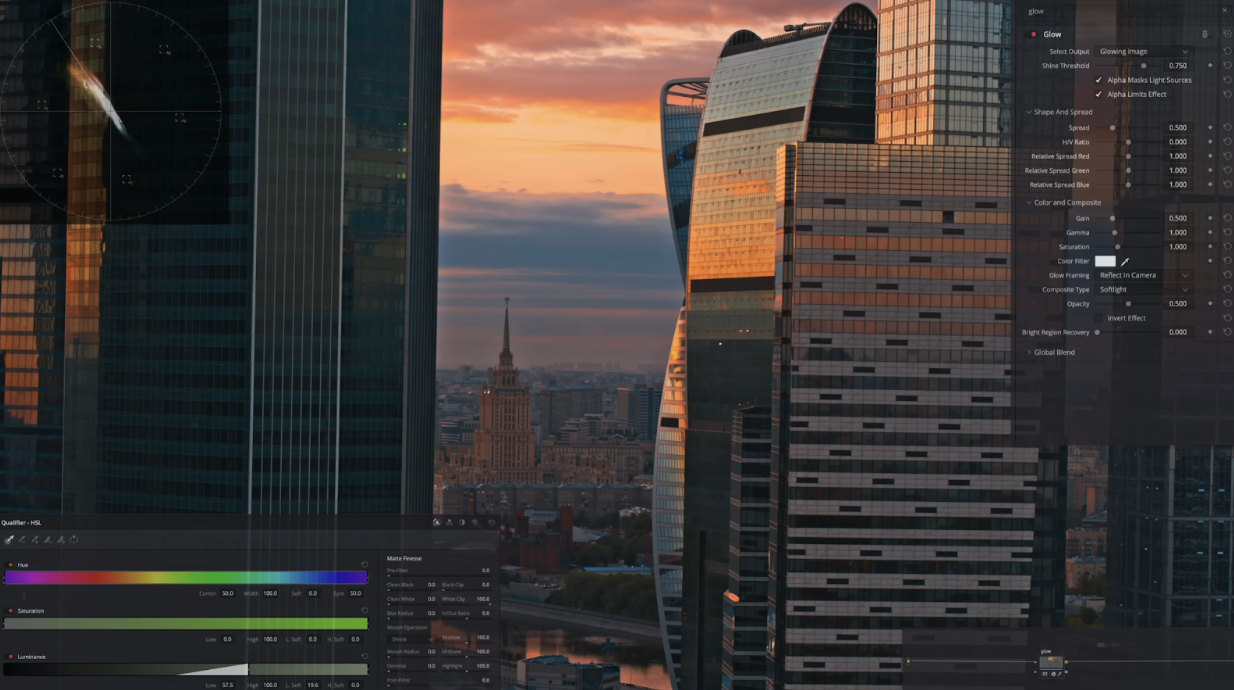
So once this is done, we can see that the effect is just hitting that sky. But let’s go ahead and play around with our shine threshold. We are going to drop our shine threshold all the way down, then move the spread all the way to 2.

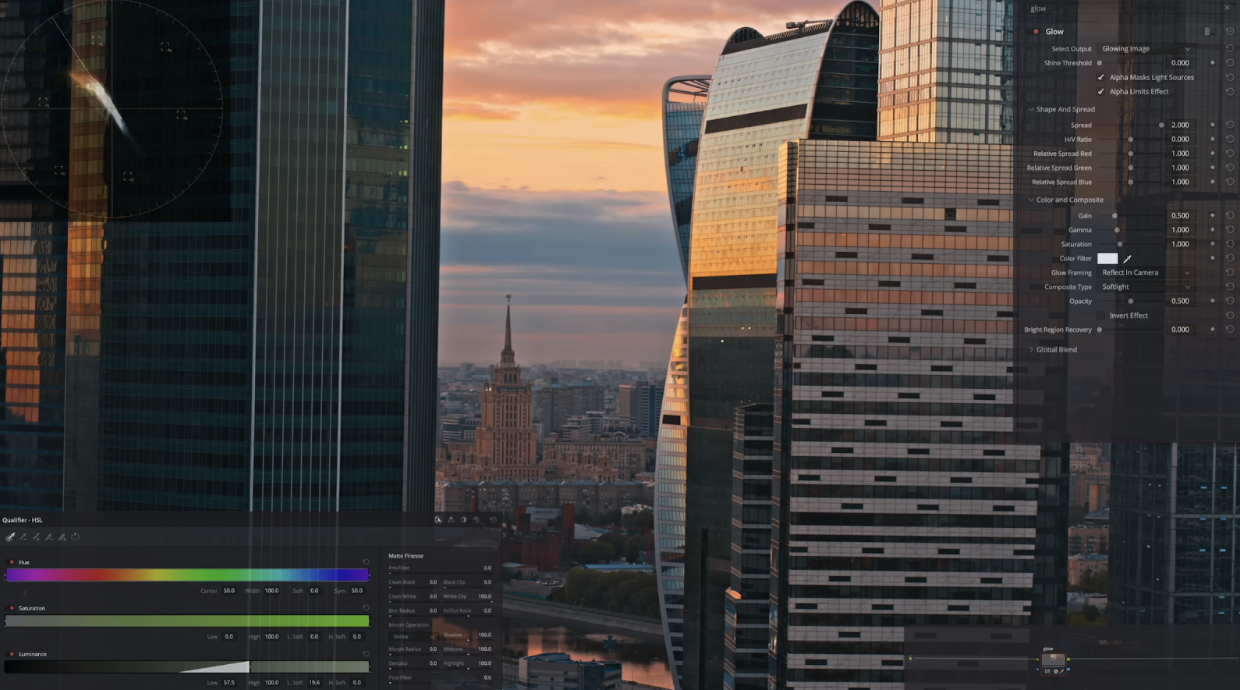
Now we are going to keep our saturation in full force, but we are going to select our color filter and watch what happens.


Look at what it does. It just makes the sunset look so epic. All we did was one node with one effect. This is the power of the glow OFX.
Now I realize that sometimes I tell you not to focus on the secondaries and fancy tools, but if you notice, we used the glow effect to help us get the job done. Every tool that you use needs to have a purpose attached to it.
On that note, work hard, get obsessed, and get possessed!