
Create The Perfect SPORTS Look In Minutes | DaVinci Resolve 18 Tutorial
What’s going on everyone! Welcome to yet another epic tutorial. Today we are talking about how to get the perfect sports look! It’s exciting because a lot of the time you’re going to be asked to create a natural look, with a lot of pop and that’s exactly what’s going to happen today. Let’s talk about the look ingredients.

Obviously we will deep dive more into these in the tutorial section.
So let’s hop into Resolve, and we already have an idea of what we want to do. This is the first of the two shots.

This is the second.

Now we first want to make sure that our project settings are done correctly. So yours should look like this.

I am going to start by laying out just a few nodes.

The first will be a color space transform going from Arri LOG C to DaVinci Wide Gamut. I want to sandwich the nodes I’m working on in that color space.

Then the last node will be the conversion from DaVinci Wide Gamut to Rec.709/Gamma 2.4.


Arri already looks great from the camera, but color grading is all about taking it to the next level.
This first shot is balanced very well, so that’s one thing I don’t need to do. Plus the exposure is looking good. So in node 4, we are going to work with our custom curves and turn on editable splines.

I am always trying to show you newer ways to grade and then when you try out the different methods, you can choose which method you like. But from here, we are going to grab the top and raise it. Then I am going to go to the bottom and take it down a bit. I will play with both a bit to dial in the right amount as well.


You will notice that the upper areas are a bit blown out, but we are going to use one of the new OFX tools that was released called depth map. This will help us pull out the background. So we will add this prior to node 2.

We will take the output and key outputs and connect them to our node 2. Then we will invert this to select the background.

Then we will open our map levels and adjust the parameters. Now this is not a tutorial on depth map, so I will be doing just a quick and fast pass for a quick matte.

Once that’s done, I will uncheck the depth map preview and then all I am going to do is use my HDR palette and bring the global offset down. Remember that we don’t want to go too extreme on this.


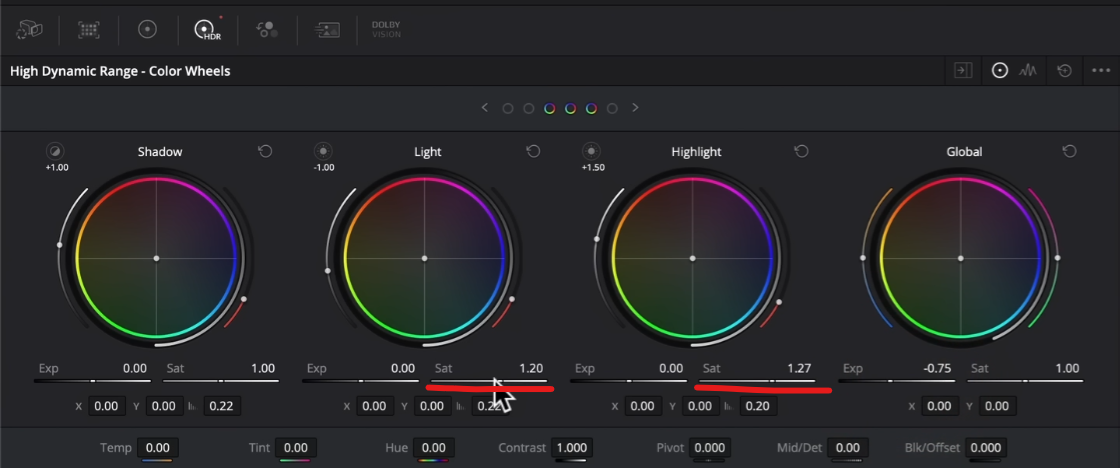
Look at the difference we made. Now depth map is pretty tough on computers, so you won’t get full playback all the time, but it is worth it. One more thing I am going to do is to crank the saturation in my highlights and lights.

I like what it does. This is a sports commercial, so it does need that juice.
Now in our (new) fourth node, I want to mess with the blues because I don’t like the blue we have. So I am going to use the HSL curves to dial in that blue.
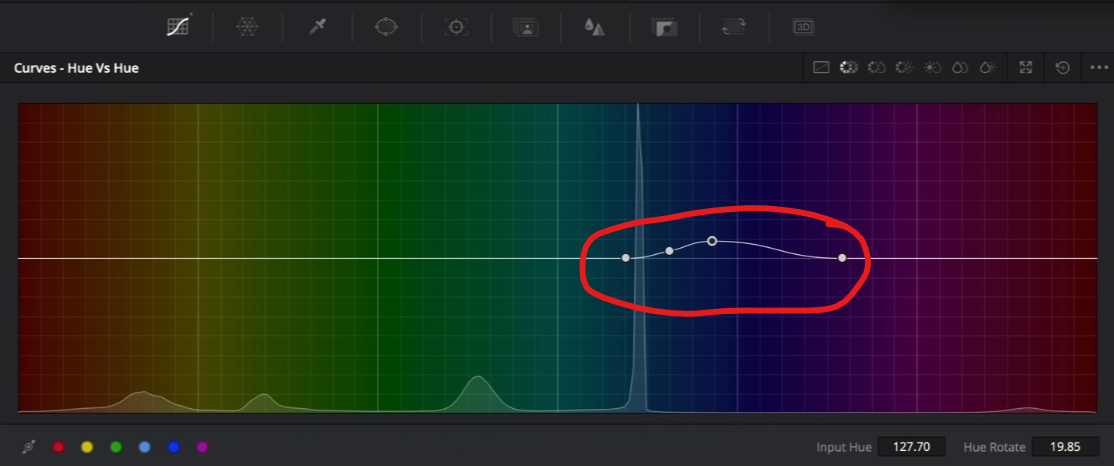
It’s subtle, but it looks more proper. Then in hue vs luminance, I want to grab the sky and pull it down a bit.


Just these four nodes have completely transformed this shot. This is why you go in with a goal. Because you take the guesswork out of things.
Moving onto our second image, we are going to basically copy and paste the grade that we built, by middle clicking on our first shot.

Now I will reset the changes we made to our depth map nodes, but we are going to keep our depth map node available, but disable it. Now I will leave the contrast as-is, but I am going to my primaries node where I am going to pull up the image a bit with my HDR palette, about ½ of a stop.

Then I want to go under my primaries color wheels and I want to grab the offset and balance it out by pulling out that nasty yellow.


I like it, but I want to mess with the curves a bit more.


At this point we are going to look at what our depth map is doing, and go from there.

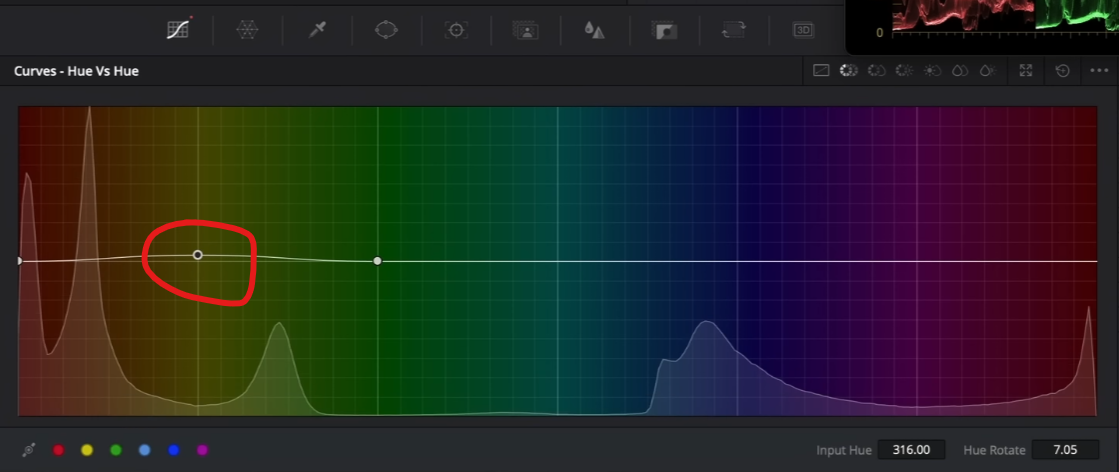
It’s doing a very good job, so what I am going to do is pick the greens and swing the hue to get the really forestry green color.


This is what I mean by affecting the saturation. You don’t have to just use global saturation.
I am going to create a new node to select the yellows, then I am going to raise it up a bit.

For this shot, we are done now. We made a bunch of great changes and really popped her out. You can see the impact of just a few changes. So let’s check these out in full screen.


So hopefully you got some golden nuggets from this video. My goal is to give you different ways to tackle different projects, so when you get that one project that needs the unique outlook, you will know what to do. So with that, work hard, get obsessed, and get possessed. I’ll see you in the next one!
MORE LIKE THIS


