
How to Shorten Your Learning Curve when Grading
I’m sure you’ve heard the saying, “Good artists copy, great ones steal.” Today we are going to teach you how to be great. In other words, stop being a consumer. You need to extract what you watch and recreate that, with your flare. So many beginners try to reinvent the wheel, which is the problem. You need to go along with the wheel, and help make it better.
Now the best thing happened a few days ago, the John Wick Chapter 4 Trailer was dropped. I loved every second of it. Now when I watch something that’s visually appealing, I take it into Resolve and bring it into a timeline. Then what I do is detect scene cuts so that it can be chopped up.

You will need the studio version for this, as it’s a part of their neural engine which is only in the studio version.
Now I can go into the color page and all the cuts are placed and cut up nicely. Now we can analyze all these clips and see what makes these shots the way they look. And the answer lies in the scopes.
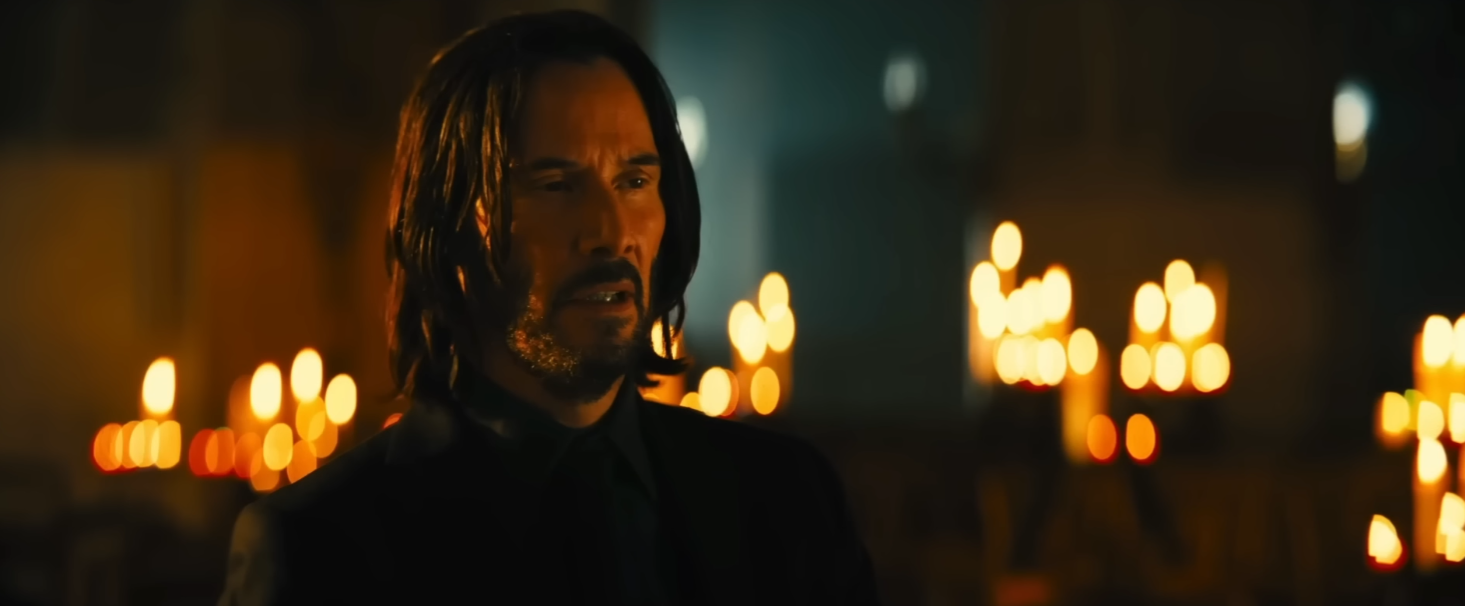
Let’s take this scene first.

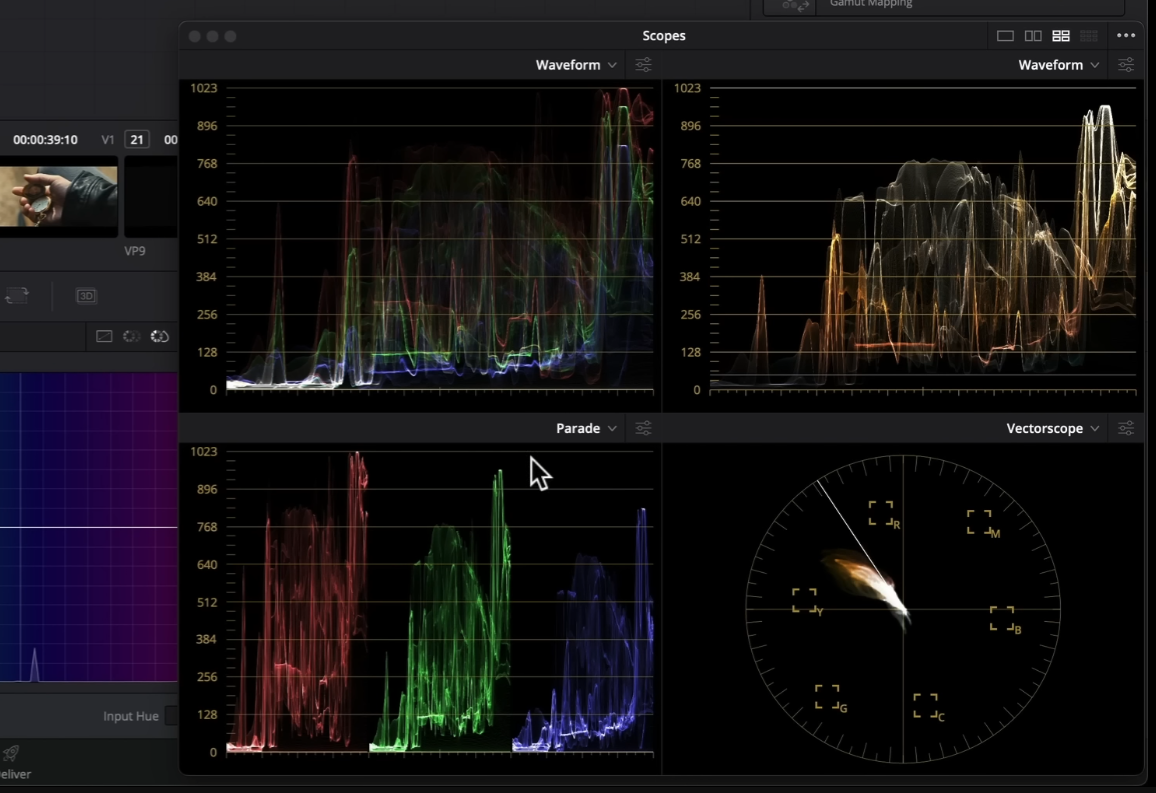
Now let’s look at the scopes.

You can see that this is super warm. And if you’re watching on your TV without scopes, it’s hard to see this represented. So now we can see it. So we can see that everything is sitting in the warmer areas. You can even see that on our parade, the blues are crushed at the bottom, and pulled down at the top. So if I raise my gain up in the blue channel, you can see that the flames start to cool off.


The scopes also help tell us where everything is sitting. The majority of this scene is sitting at the bottom, minus the candles. It is a dark scene by nature, lit by candles, but we have a very saturated and orange skin tone. To show you, if we pull back on the saturation, you can see that the skin sits more “normal.”


But that’s the magic. This is one of those secrets:
You will never push your image that much, unless you can see the scopes and visually see what’s happening to the image.
You will never do it because you’ll think it’s too pushed.
Now moving onto our next shot, we can see right off the bat that our highlights are gone.

I mean this is Hollywood, can’t they have the VFX department do a sky replacement? No, that’s not necessary. That’s another permission you get when you see it done. Why would you reinvent the wheel when someone else, who is one of the best, is already doing that. Just study it, learn from it, and see what we can and cannot do.
Now you may think that this is the same scene, so of course the colors are going to look that way, but check out this scene, which is a completely different scene.

You can still see similarities in the scenes. That is one thing you need to understand is that when you are building a look DNA, it still has to somewhat tie in. If you’re going for a really pushed look, you are going to have to find similarities to tie in everything together.
And this goes a bit further. When I do a tutorial, a lot of times people complain that they can’t see the details in the shadows after seeing the rec.709. Yet here, we can’t see anything in his shirt.
Obviously we don’t have the rec.709, which in turn, helps sell that look. We accept it and see it so stylized and love it. I bet that in LOG and rec.709, everything was protected, and Jill, pushed the look this far with the blessing of the DP and director. We don’t care about this because we are focusing on his face. So this is what we are learning by studying the best.
I mean look here at this complimentary scheme going on.

Any changes to this or any “normal” thing done to this wouldn’t be right because it’s John Wick. They are all pushed like this.
Now it’s one thing to look at this, but you also have to play what I call the “what if” game. Let’s take this shot as an example.

Now I can look at this, take the vectorscope and say, “I like this…but what if.” What if it were a cold, winter morning somewhere instead of this warm look. So let’s make that change in our gain.


So we just went from the Middle East to London. So it’s easy to put people in different environments or periods.
Now let’s move on to this shot.

Now we know that this is a great example of some key action happening here. Jill probably went in and pulled a key to keep their skin tones proper and shift everything else to cyan. I mean this is one of my favorite shots in the entire thing because again, they are in New York and it’s so cold. Now if we make the cyan more balanced, you get a completely different look and feel.

Just take a look at the blacks in this image too. They are pushed. And that’s the theme of this movie. And I’m here for it.
Another great example is this scene right here.
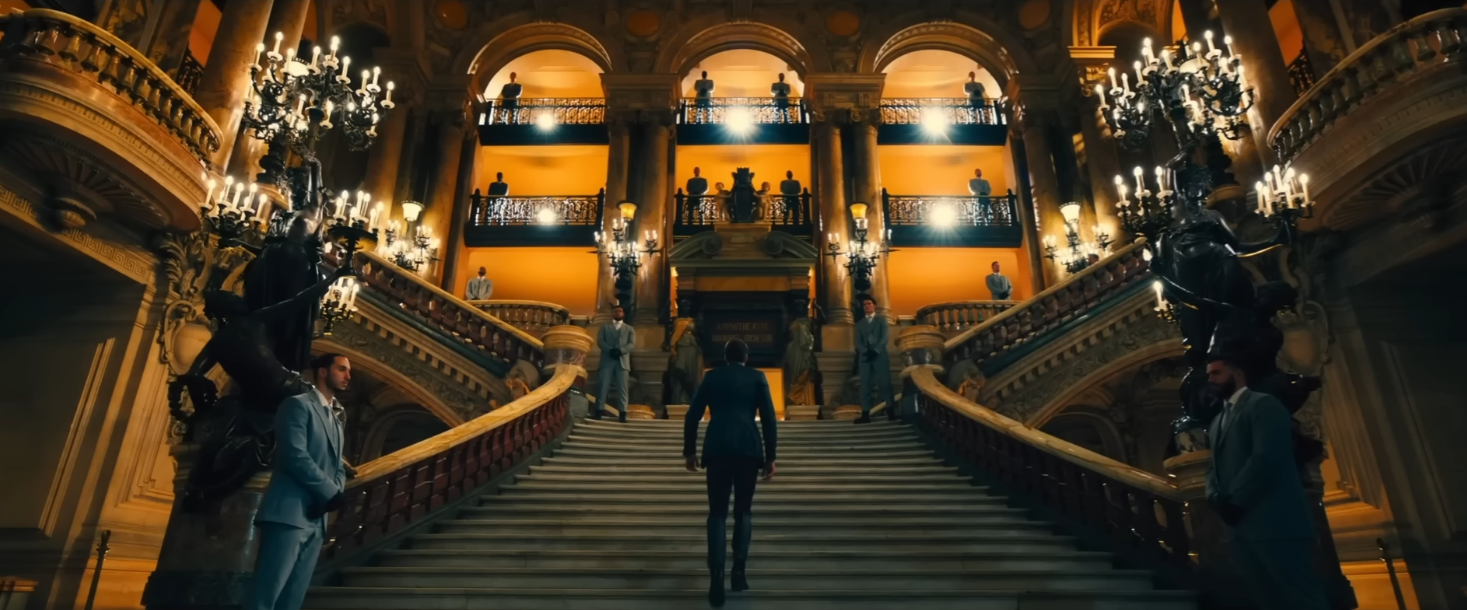
Just the way these are gold mixed with the cyan is just perfect. It’s so regal. The gold and the saturation in this image is just spectacular. It’s what makes this image sparkle. If we make the gold more red, or take out saturation, it completely loses its character. But this does not mean everything needs to be this saturated. This is why it is important to find your style and be valuable/malleable as well so you can change it up. First master one thing, then move onto the next thing.
Moving onto the next shot, this one is just so gorgeous.


Just look where everything is sitting. It’s bright and I love that. And they are sticking to the theme of yellows. Now Jill graded Joker, and in that we saw that the yellows were more towards the reds because the DP Lawrence Sher loves that color. But in this movie, she’s playing with yellows a lot.

I mean this has just crazy cyan, but also perfect yellow. This is a very modern orange and teal look.
Moving onto the next shot, just look how much saturation is in this shot.


Jill’s work is just super unapologetic and the contrast is so pushed, yet it doesn’t come at a cost of skin tones. They are still beautiful and pretty and that’s important.
Like look at the skin tones on this one.

She’s pushing the hell out of this one, but look at that perfect skin tone. It’s not dirty at all.
Let’s switch gears and go to a different scene.

Now I hate throwing out blanket statements, but this does give me a mad max vibe. It’s so pushed and unapologetic, yet it’s funny how Jill works. This is a situation where she let it breathe. If you look at the scopes, at the bottom there is some room.

Now a complete opposite from that, we have this scene.

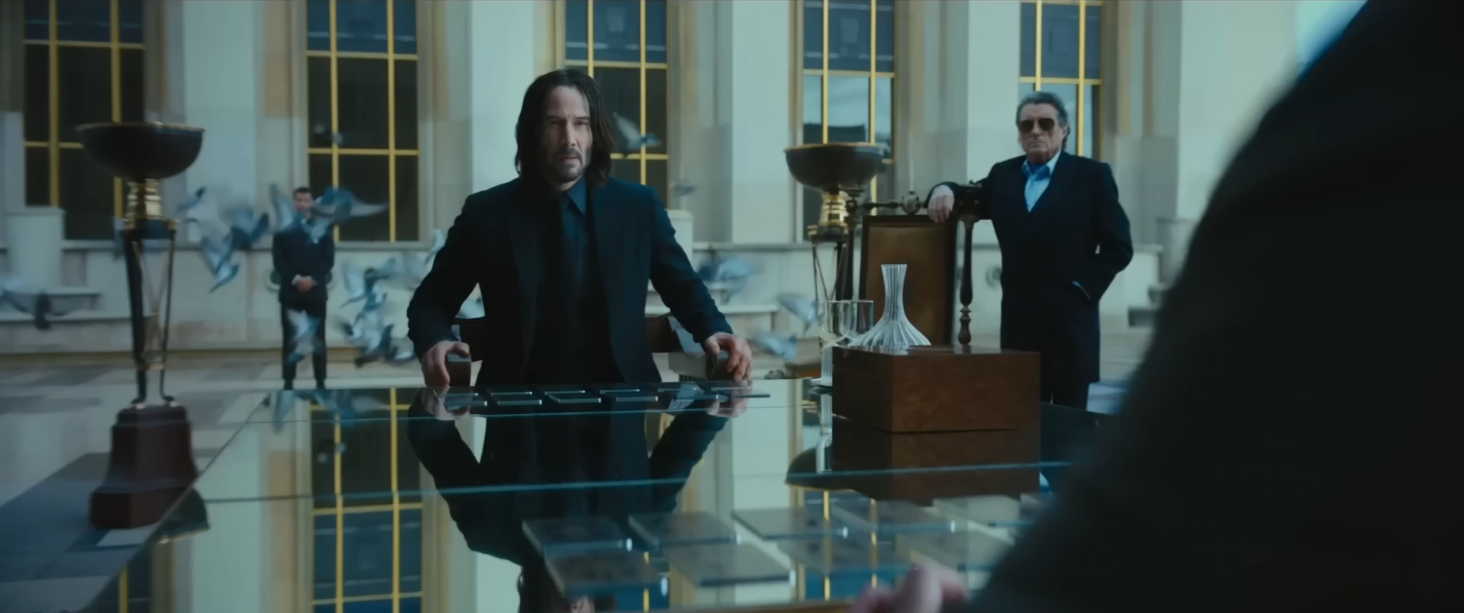

This is probably the most desaturated part of the trailer, yet it looks so beautiful. Cool vibes on a cloudy day in Paris. And I’m buying it.
This scene here is pretty cool.

The one thing with this is that when you push an image this much, you still want to keep the focus in the middle on the subjects. I can tell there is a window on the center, feathered out and the outside is pulled down. You can see the lights go from darker to brighter but we want to keep the focus on what’s happening in the center. That’s what we are seeing and that’s how the magic is done.
Now taking a scene like this, we are going to play the what if game.

Where are the skin tones sitting here? It’s sitting perfectly on this. But if I were to go in and add some warmth in using the gain, it would raise his skin up.

But this is where the what if game is interesting because this is where the flare comes in.
Now what I am going to do is go through and select a bunch of stills and save them into a power grade bin. I want to get a wide variety of shots.

So now this is permanently saved. I’ve started to build my library of looks now. So, going forward, anytime you’re working on a shot that has a similar vibe, you can pull these up and use them as your reference.
Now at this point, your only obstacle is your mindset. Get out of your way and put in the hours and the results you will get, will blow you away. As always, work hard, get obsessed and get possessed.
MORE LIKE THIS


