
Pro Colorist Grades Fujifilm XT4 Footage - Is it better than Sony?
What’s going on Qaznation! Welcome back to another epic tutorial! Today we are covering a topic that tons of people have requested from me: Fujifilm XT-4 footage. So we are doing that today. Get pumped!
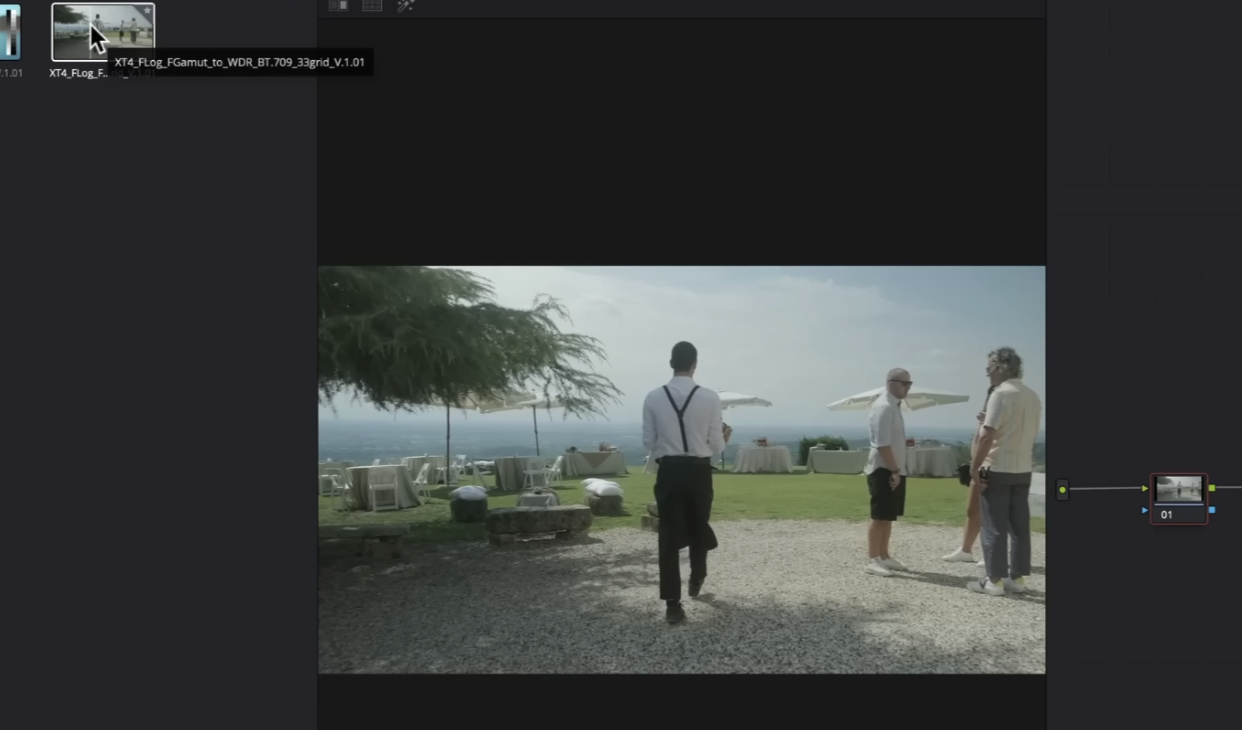
Alright, hoping into Resolve, let’s park it on our hero frame.

This was obviously shot in LOG on the Fujifilm XT-4. We need to convert it and do our base correction, then dive in and see how much we can push it.
Now what I want to show you is that we are going to use LUTs provided by the manufacturer, then we are going to have to jerryrig the CST because it’s not readily available. But first, we are going to add our LUT. Now I do have a link in the description of the video to these LUT packs that you can download directly from Fujifilm. But let’s go to the XT-4 folder and when you hover over the LUT, it will give you a preview of what it’ll look like when you apply a LUT.
The one I am hovering over is a wide dynamic range conversion and I like it because it’s giving me a lot of room to work with. The Eterna one in there is more of a pushed version. A lot of manufacturers are starting to create LUTs that push it a bit so that if you’re a run and gun person, you can do it more easily.
Here is the Eterna:

Here is the wide dynamic range:

Now I am going to reset and create another version and do a simple 5 node node tree with a DWG (DaVinci Wide Gamut) sandwich.

Since there is no Fujifilm option in the CST, we are going to have to pick which color space we think is best. But I did the hard work for you and I think the Panasonic V-Gamut is the best. So that’s what we are going to set it to.
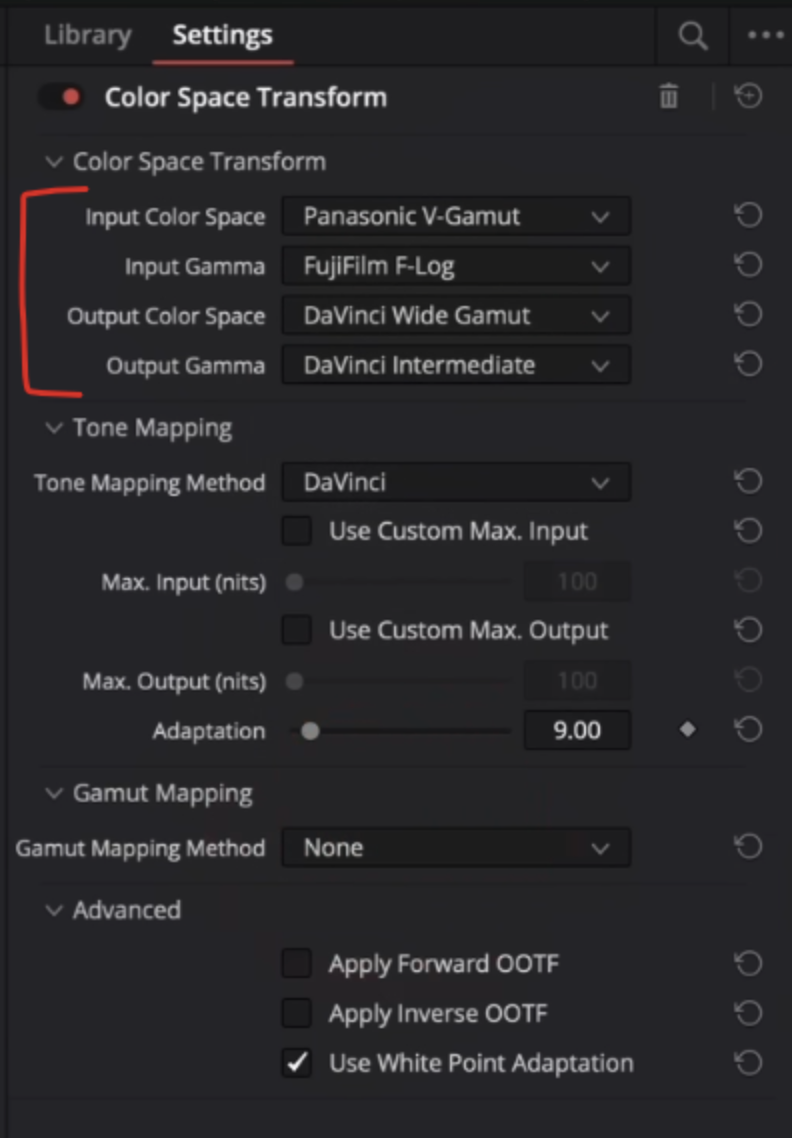
That’s the parameter for the input transform.

That’s for the output transform.
Looking over the image, it’s all pretty good when it comes to balance and overall exposure. But what I want to do is go into my 6th node and work on a custom curve.


With something as simple as the curves, we really brought out the pop in the image. Our punch is looking great, the grass is vibrant and green, the sky is nice. Everything is just sitting very well.
Next we are going to move to our 4th node and use our color warper. I am going to change my bit mode to 12, then auto lock to 3 points.

Now whenever we click in the web, it’ll select three points farther from middle and closer to center. I am going to start by clicking and moving the blue in the sky to accentuate it. Then move to the grass and burn it a bit.


So far I am impressed with how it’s been able to handle this.
I am going to now go into my 3rd node and call it HSL. We are going to use, first, our hue vs saturation curve and select the blue in his shirt and now pull it down.


So far we have been doing a pretty heavy push and pull and it’s held up. I’m very impressed with it.
Moving now to our 5th node, or base look, we are going to use our lift, gamma, gain. I want to first add some warmth in the gain, then I want to counter it in my lift to keep those shadows clean. Then I want to move my gamma to add some warmth. Then I am going to take my offset and add a bit more magenta. Then I want to drop my saturation a bit, just so that the gravel area looks believable. The rest will fall into place.


We didn’t do anything unique but it was tastefully done and just look how it holds up. It takes us somewhere. If we really want to go somewhere crazy, I can push it a bit more.


It’s pushed, but it works. I mean let’s compare it to this shot.

When you put it next to that, you look pretty conservative. I even like the contrast in this shot, so I am going to move into my custom curve and see if I can push it a bit more.

Then can we bring back some saturation and push it a bit more?


We are still not pushing it as far as we could, but we are in a good spot. If you think the pillow and the top are a bit too hot, we can go under our primaries wheels and drop our highlights slider.


Just in that one node we’ve already created a pretty great look.
This is where I would park it, but I do want to add halation. When you drop it on it looks awful, so we are going to dial it down to these specs.
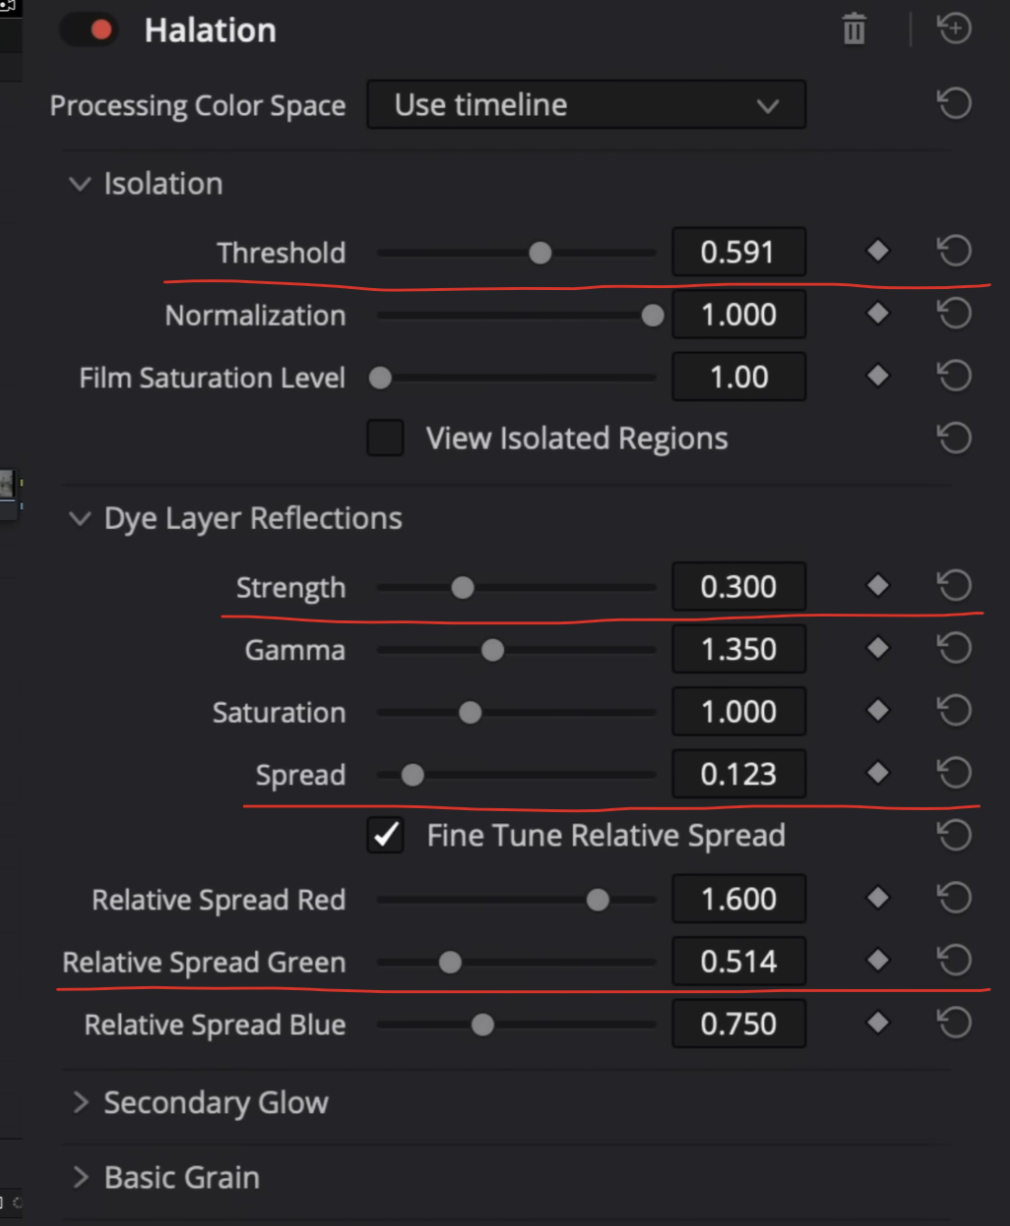
Now we are going to use the grain tab in this effect. It’s way too strong at first, so we are going to cut everything in half.


There you have it. Let’s check this out in fullscreen!

Well there you have it. My thoughts are that I feel like it’s pretty good. It reminds me a lot of GH6. The highs and lows are on the bring of clipping once you push it. It doesn’t have that edge that RED or Alexa have, but obviously since there is a humongous price difference. But even Sony feels better with this new sauce they’ve been cooking. The XT-4 is a clean image, but it’s a bit clippy up top. But it was a very good experience one way or the other. With that, work hard, get obsessed and get possessed.