
Pro Colorist Grades Sony FX30 Footage - Is it any good?
What’s going on Qaznation! In this video we are going to push the image to its breaking point and pull it back a bit.
Now I don’t subscribe to benchmarks and other useless metrics. This is going to be a heavy grade to tell us whether this footage can handle it. In this video we are going to do the following (picture below)

Before we jump into the tutorial, I do want to do a quick camera overview/breakdown from a post-production angle.

If you want to know more about the camera from a production standpoint, then go check out Jason Morris.

He actually provided me with the footage.
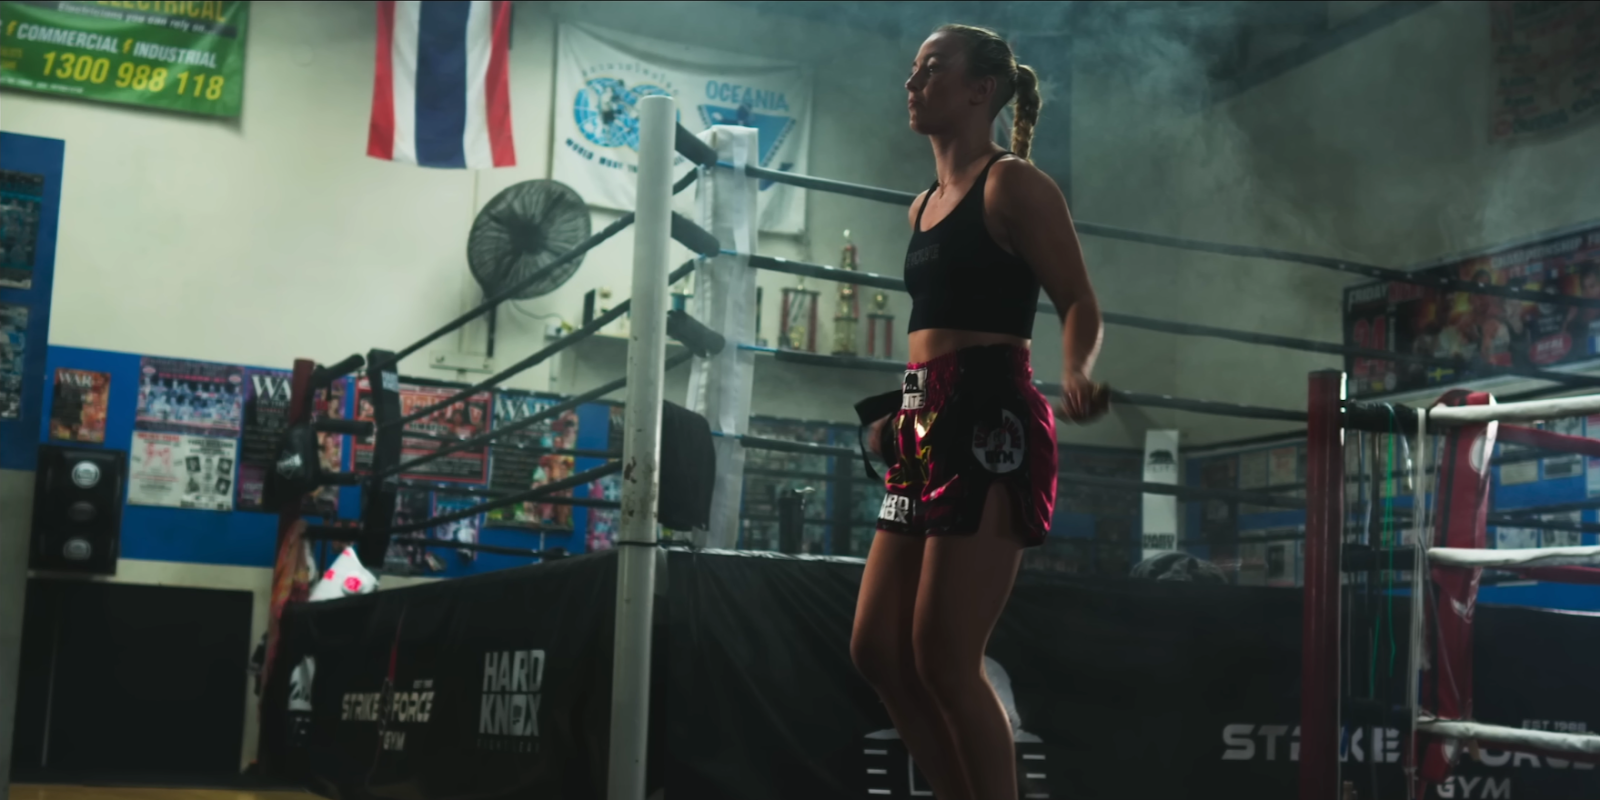
Alright, now we are inside Resolve and we are going to be working with this shot.

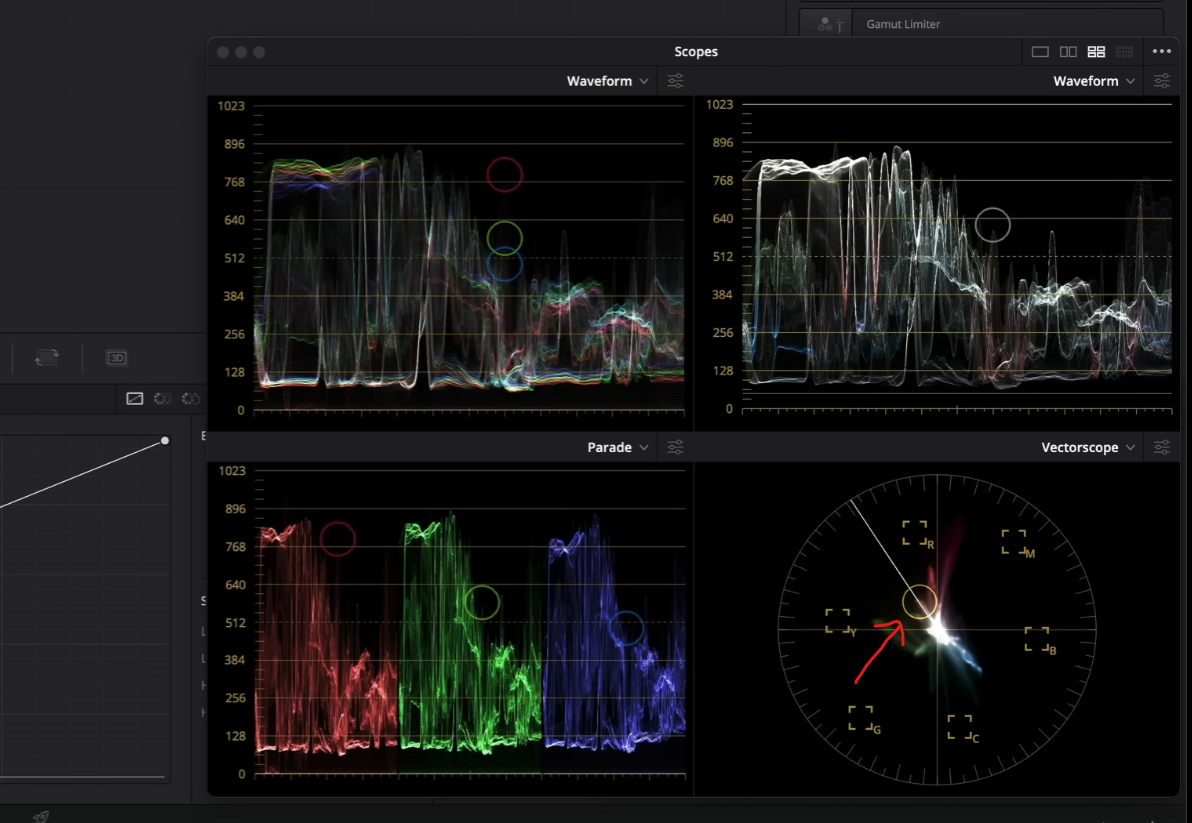
If we look at the scopes, we can see that everything is shot a bit to the right, meaning it’s a bit overexposed.

This is actually the correct way to do it. That way you avoid getting gunky noise in the image.
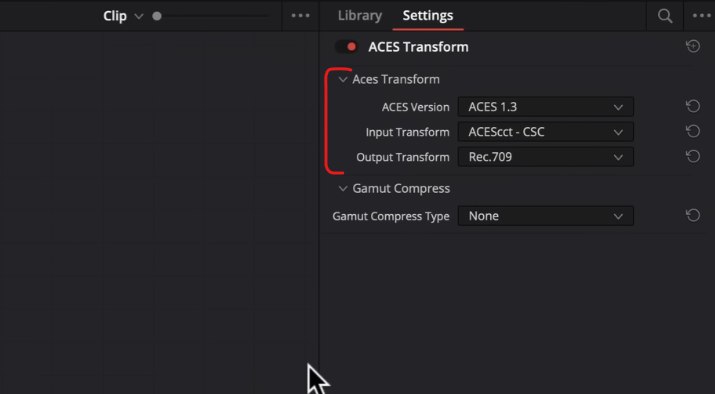
Instead of building out a node tree, I am actually going to build one as we go. First thing we need to do is check out our color management before we start.

This is what we want for our project settings.
Now I am going to create two more nodes and on the first node, I am going to use an ACES input transform.

I want to change it to an ACES working space instead of choking it and turning it into rec.709. But in my last node, I want to do another ACES transform and this is where I will turn it into rec.709.

Obviously this image still doesn’t look right, but we will be working on it.
Now in my second node, I am going to go into my global offset and pull down on the global exposure. The reason I use the HDR palette is that this tab is basically like using camera RAW. I want to drop the global offset heavily.


Do you see how everything came back? That is our first test to see how it handles being overexposed, in post. You can see in our scopes that everything is sitting great and nothing is clipped.

So now I am going to create another node and I want to jump into custom curves. I want to create a contrast for my image.


What’s impressive is how far you can push it. Things aren’t blown out, even though the shot was shot on the right of exposure.
One thing to note about Sony, is that they’ve really developed their color science and come a long way. It used to be that the skin was always off, but you can see here that the skin looks perfect. And I haven’t even touched the skin.
The next step is going to be fun. I am going to create a layer mixer. On the bottom layer mixer node, I am going to qualify the skin.


When I pull the key, you can see it’s really clean. None of that 8-bit artifacting that Sony has been known for. I do want to go into the denoise and blur in the qualifier and bring them up.

All of this is going to tell us when we make a change, how well it holds up.
Now we are going into our top layer mixer node and we are going to use our offset wheel (or printer lights, same thing) to make some adjustments. What I am going to do is use my half printer lights and add a bit of green.

You can see her skin is still perfect because we have her skin qualified with a layer mixer which protects them. So we are making this gorgeous teal and orange without going over the top. It’s almost Top Gun inspired.

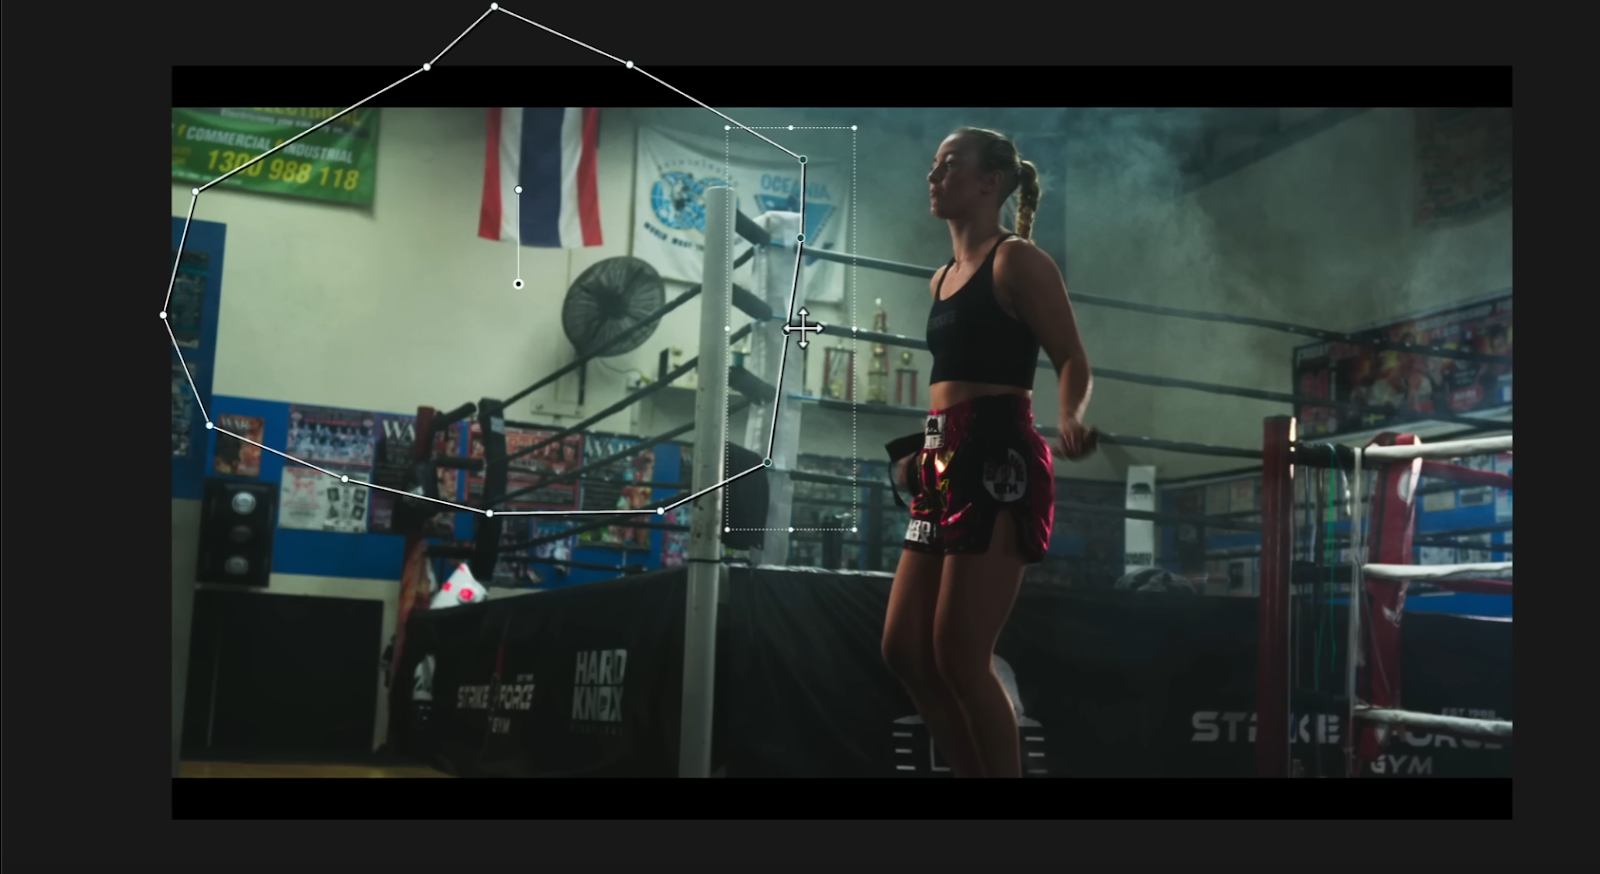
Now I am going to add another node after the layer mixer, and then create a parallel node. On my top node, I am going to create a custom window. I don’t like how bright the white wall is and it takes my focus away from the subject so I am going to create a custom shape.

I am also going to soften it a lot to make sure it blends in.

I will then want to track the footage to make sure it stays locked.

Now even though it’s not necessary, we are going to create another window to put a vignette around our hero. And I’m going to feather and invert it.


Then I want to pull down on the gamma a bit.


So as we chip away around her, our eyes automatically go to her.
Now I am going to create a node after our custom curves and add the glow effect to it. We will change the composite type to softlight to start off. Then we will bring back the shine threshold, but bring up the spread. Then we will mess with the gamma and gain to dial in the effect.


Obviously if you are grading for a client, you can take it or leave it. It does make it a bit punchy, so I will bring the global blend slider down to right around half.


Just like that. That looks pretty good.
Now I am going to add another node for halation and grain. What I am going to use is called Film Box. It’s a third party plug-in that I stand by. When you first apply it, it’ll go haywire. So we are going to change the mode to halation and grain only. Then I want to go under the advanced settings and change the style to s35mm 50D and cut the strength in half.


It adds just the right amount of grain and look at that halation. But we want to add a bit more color in the halation tab to exaggerate it a bit.

It’s crazy to see how far we’ve come from the LOG format or even rec.709.
At this point, if someone says it’s too dark, we can adjust our custom curves to fix that.


Now I want to go back to my custom window and actually extend it a bit. But a cool trick is if you hit shift and drag across multiple points, you can actually move them all at once.

Now I do want to do the same thing on the opposite side because it’s a bit distracting. I will also want to make sure it’s softened and tracked as well.


So if you say it should be pushed more because it’s not touching the top and bottom of the scopes, well let me show you some examples of hollywood movies and where they sit on the scopes.


So you can see from these images that we are sitting pretty!
Now to push the image even more, I am going to go into my custom curves and go under the hue vs hue. I want to select the blue channel to swing it and make the blue look vintage.


Another thing I want to do is take the red bag and make it more pure red. I’m going to click on it to get the precise color.

Then I’m going to use hue vs saturation and click on it again and bring up the saturation in that bag.


Then I want to take the green back a bit in the flag up in the top left corner.


One last thing I want to do is go into the saturation vs saturation part and bring down the most saturated areas.


This all goes to help get that vintage vibe we are going for. And we didn’t have to use any LUTs. That’s another beauty of using ACES.
Now let’s check this out in full screen.

So there we have it. The FX30 pretty much did everything I threw at it. Obviously this is one situation and one location. We haven’t tested out the low light or even RGB lighting. But what we have experienced is that we are very close to a level playing field when it comes to filmmaking. This is an $1800 camera that is putting out this kind of image, which blows my mind. So on that note, work hard, get obsessed and get possessed. See you in the next one.
MORE LIKE THIS


