
5 Things You may be Doing that are Ruining Your Grades | DaVinci Resolve Tutorial
What’s going on guys! It’s been awhile but I’m happy to be back! This is going to be a great video where we cover 5 things you may be doing that are ruining your grades. This isn’t just a beginner thing, but for everyone.
So jumping straight in, we are working with RED footage, but it doesn’t matter what it’s shot on because none of those things matter if your technique isn’t proper. Now let’s quickly make sure our project settings are set up right. You’ll want these settings in the picture below.

Now let’s jump in. We are going to add a node and move it to the far right because we want to do our LOG to REC.709 conversion on the last node. So we are going to use a color space transform to take it from LOG to REC.709. This is a RED clip so we are going to select the proper settings.
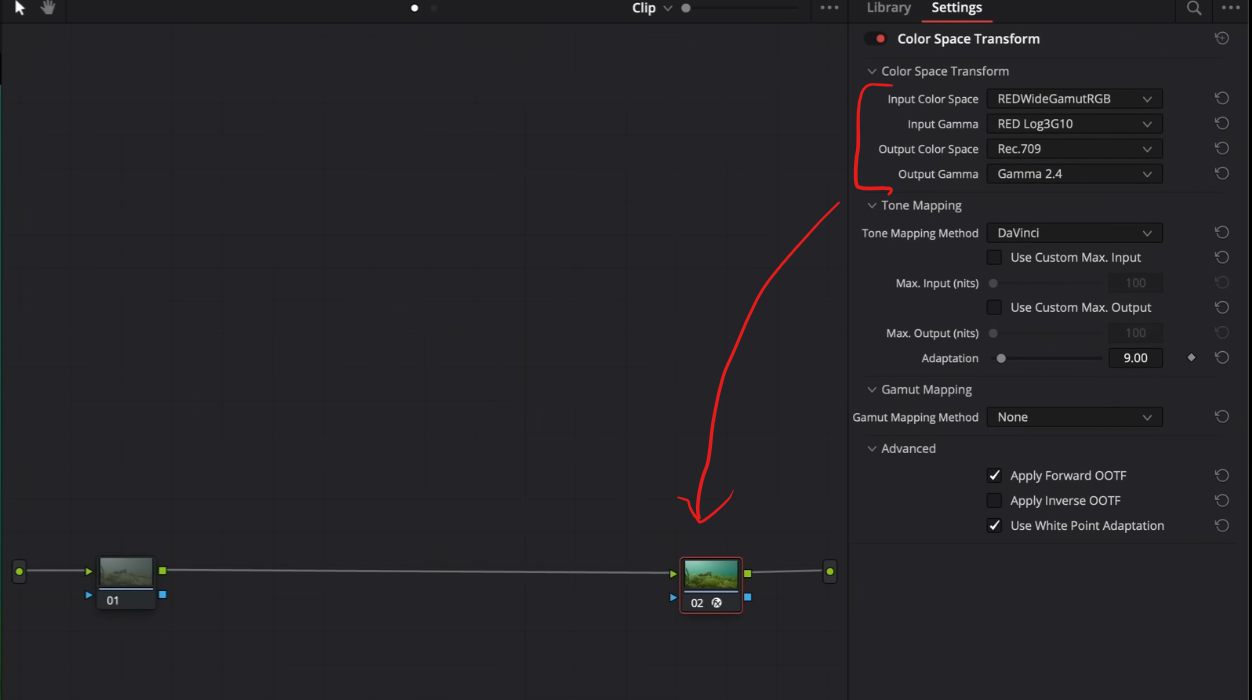

The reason we do this is we want to use new Resolve tools to take advantage of the goodness, but if you do it after the conversion you are choking your footage. You want to take advantage of the LOG footage.
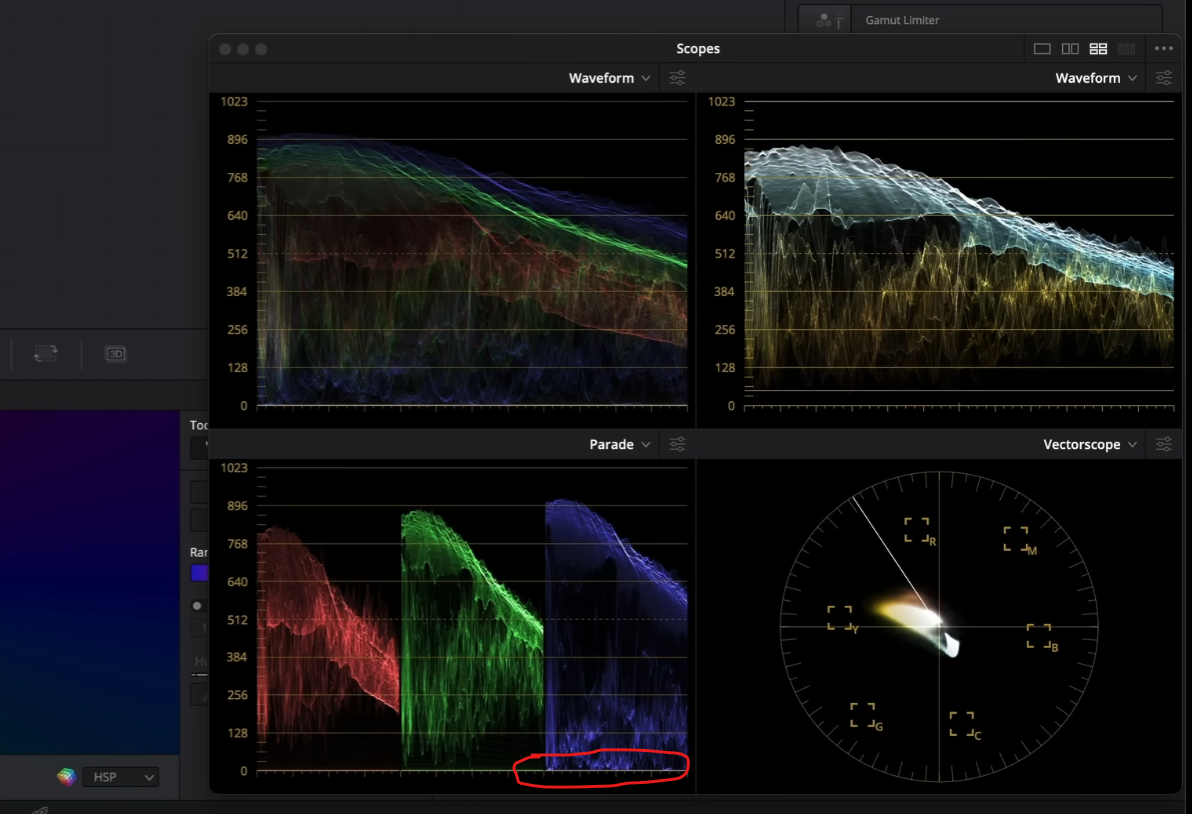
Now we can see in our scopes that there is a lot of green and cyan in our image.

But let’s move onto the first mistake which is balancing your shot. What might be happening is you start on a granular level with the lift, gamma, gain, but I always say that it’s best to start broad, then narrow in. If we do use our primaries, you can see that we have to take so many steps and we still don’t get there. It’s not a huge chance. So let’s do it in a professional way. We are going to move our offset away from where everything is sitting.


Just look at that huge change. Everything looks so good and proper. So this is step number 1.
The goal is to shave off as many steps as possible so you can spend more time in the creative process and less in the granular grunt work.
Moving onto the second thing which is adjusting your exposure. So what I am going to do is create a new node. Someone with less experience might adjust their exposure with lift, gamma, and gain to open their image. Again, by looking at the image, it looks fine.

But the problem we are facing is that the scopes are clipped in the blue channel.
But we are also stuck on granular controls and it’s not getting us to where we need to go with our image. So instead what a professional would do, is go into the HDR palette, and work in it there. And because we are in the DaVinci Wide Gamut space, it’s going to treat the wheels as camera stops, almost. So for this, I want to raise the offset in the HDR wheels up a ¼ stop.

Now I can go into my primaries and use contrast and pivot to dial it in.


Look at that result and how much quicker and simpler it was to do this, than the beginners approach.
Now moving onto our third step, starting with a LUT. So we are going to save our grade as a version, and then one mistake people make is buying a LUT pack online. What that lacks is the fundamentals. So I’m going to assume that you would know how to properly convert to use the film LUTs built into Resolve. So here’s that conversion (pictured below).
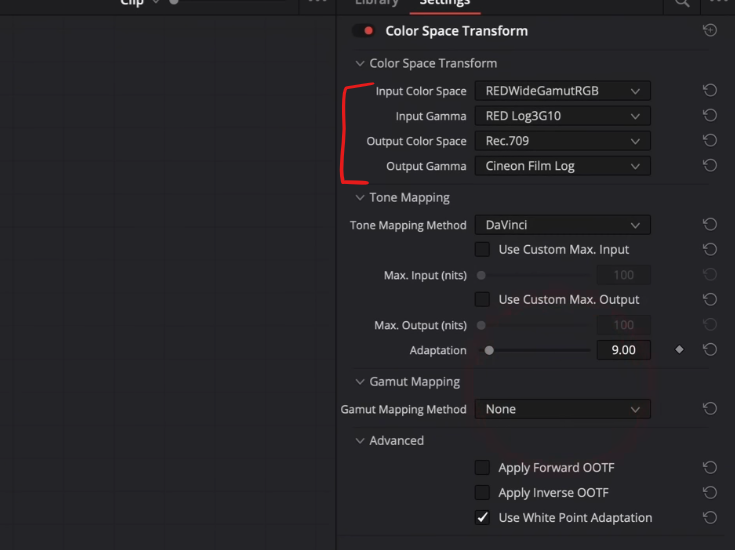
Now you’re converting to cineon so that you can bring in that FPE from Resolve. So let’s say you drop on the Kodak 2383 D65 LUT on.


And yeah, it looks pretty good, but look where everything is sitting.

And because this footage is rec.709, look how our color warper got choked.

Everything is already maxing out. Let me show you what I mean. Let’s compare that to our previous example.

This is why I say I do everything downstream because it gives you access to the LOG footage which gives you so much more range and information. So properly converting and understanding your image is mandatory for you to not mess up your grades. That’s why you want to balance your shots first and then bring in creative LUTs later.
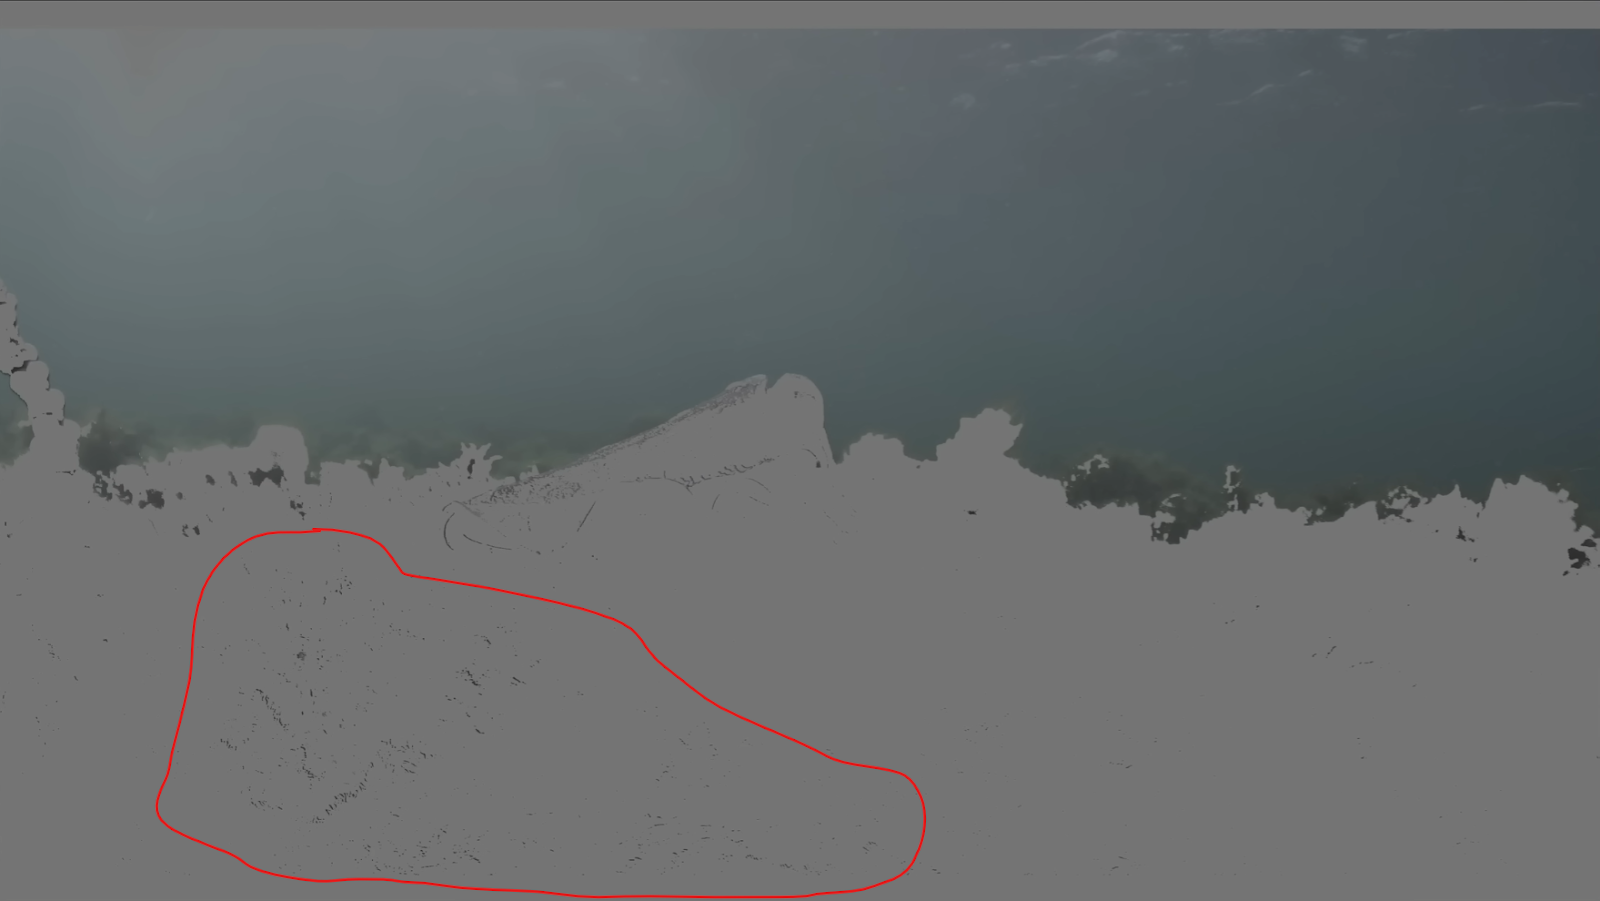
Now moving onto our number 4 wrong thing, overusing qualifiers. This can ruin your grade. Now things can look good on a smaller screen, but also this is RED footage. Which is 16-bit RAW. The capabilities of RED kicks in and will give you the best bang for your buck. But if you do that on an 8-bit image, it will ruin your grade. But even on RED, look what happens when you try to qualify the yellows.

You can see that this is breaking the image. This will show artificating on bigger screens and everyone can see that. And after this qualifier, they will create a parallel node and select the sky.
Now the hard part is that because this is RED and it has that 16-bit, it’s hard to show how bad it really is with 8 or even 10-bit.
So what can we do instead? You can use the HSL curves. Then click on the color you want and it drops points on the curves.

Then at this point I can start playing with it, and then if you hit play everything is crisp and clean.


And again, how much easier is this than using qualifiers. It also helps keep things kosher so you don’t have to worry about breaking your image.
Now our final and fifth point is overusing power windows. There is a time and place to use power windows. For instance, a beginner might create a window at the top where the sun rays are, to bring down the exposure, then a power window on the coral and then one fish to bring those parts up in exposure. And then you have to track all those windows. That’s a lot of time wasted if there are more shots and takes. So instead, here is what we can do. We can add a natural custom window.

Then I want to invert it.

Then I want to feather out the mask so that it blends well. And then I want to pull down the gamma to darken the surrounding areas.

Then with this, we can create an outside node by right clicking on our node and adding another one.

Then here, we can raise our gain a bit to bring out our fish.


This gave us our beautiful and simple look in two easy steps. And this will be very easy to copy and paste onto other shots.
Now let’s check out our final look in full screen!

Hopefully this was helpful. I know these will take time to break the habits, but trust me, in the long run it will save both time and headache. With that, work hard, get obsessed and get possessed. I’ll see you in the next one!
MORE LIKE THIS


