
Learn DaVinci Resolve in 20 Minutes! Beginner Tutorial
What’s going on Qaznation! To preface this tutorial, it is a color grading based tutorial, not a general overview of DaVinci Resolve.
For those of you who are on the fence about DaVinci Resolve, wondering why it would be good to switch when you know how to use Premiere or FCPX, let me tell you that Resolve is a completely different beast. Some of the biggest names in cinema were graded in Resolve, such as Spiderman, Jurassic World and Top Gun Maverick. So why would you not want to learn the most powerful finishing tool? Oh, and a bonus, it’s free.
In order to use Resolve, you first have to download it and to do that you are going to search for it on google. Then you will click on the download link.

That will bring up the BlackMagic Design DaVinci Resolve page and you can choose between two options. Download the free version or buy the full version for a one-time payment of $295.

Once you click on the download free version (or if you buy it, you will download the studio version), you will be prompted to select which one you want.

Then you have to input some details.
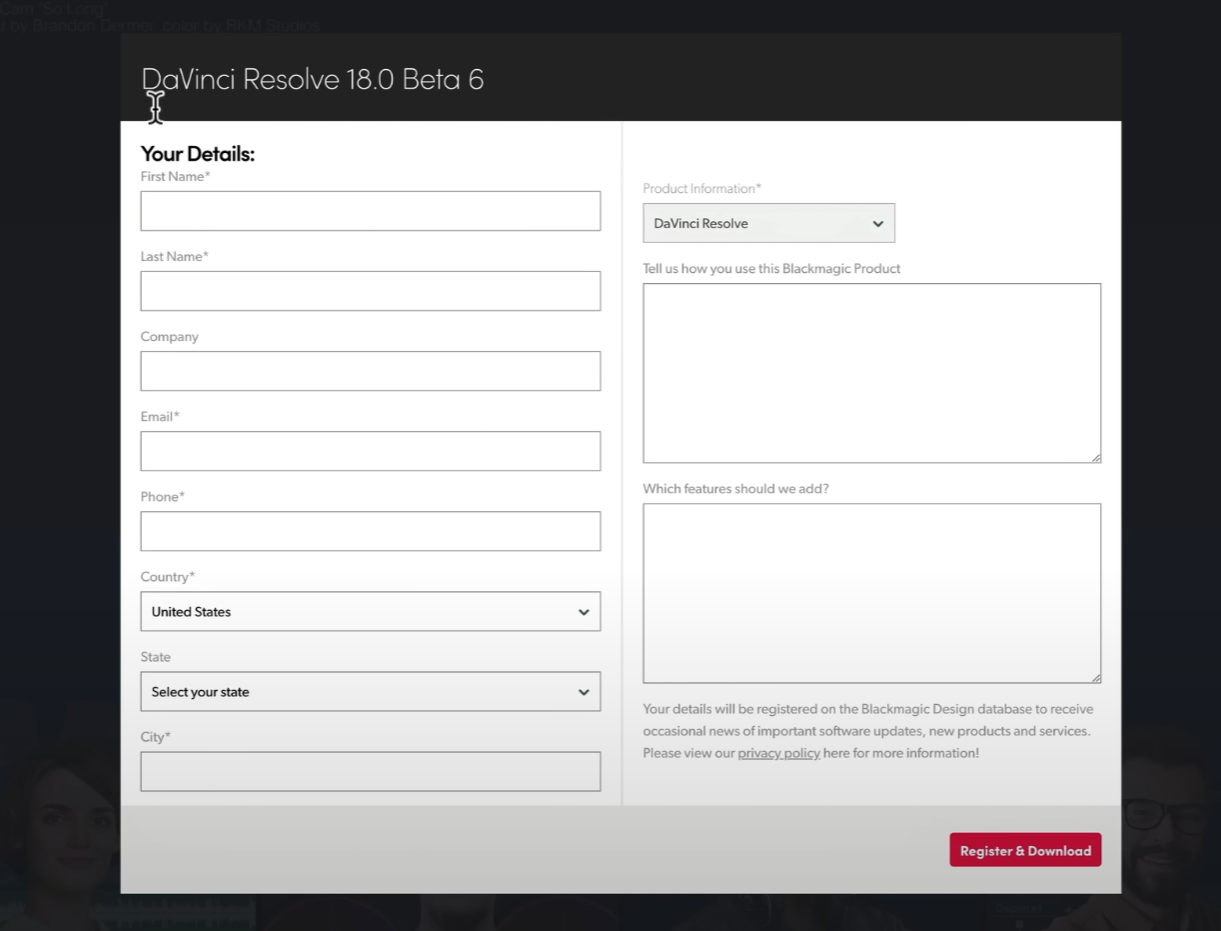
Then you hit the register and download at the bottom.
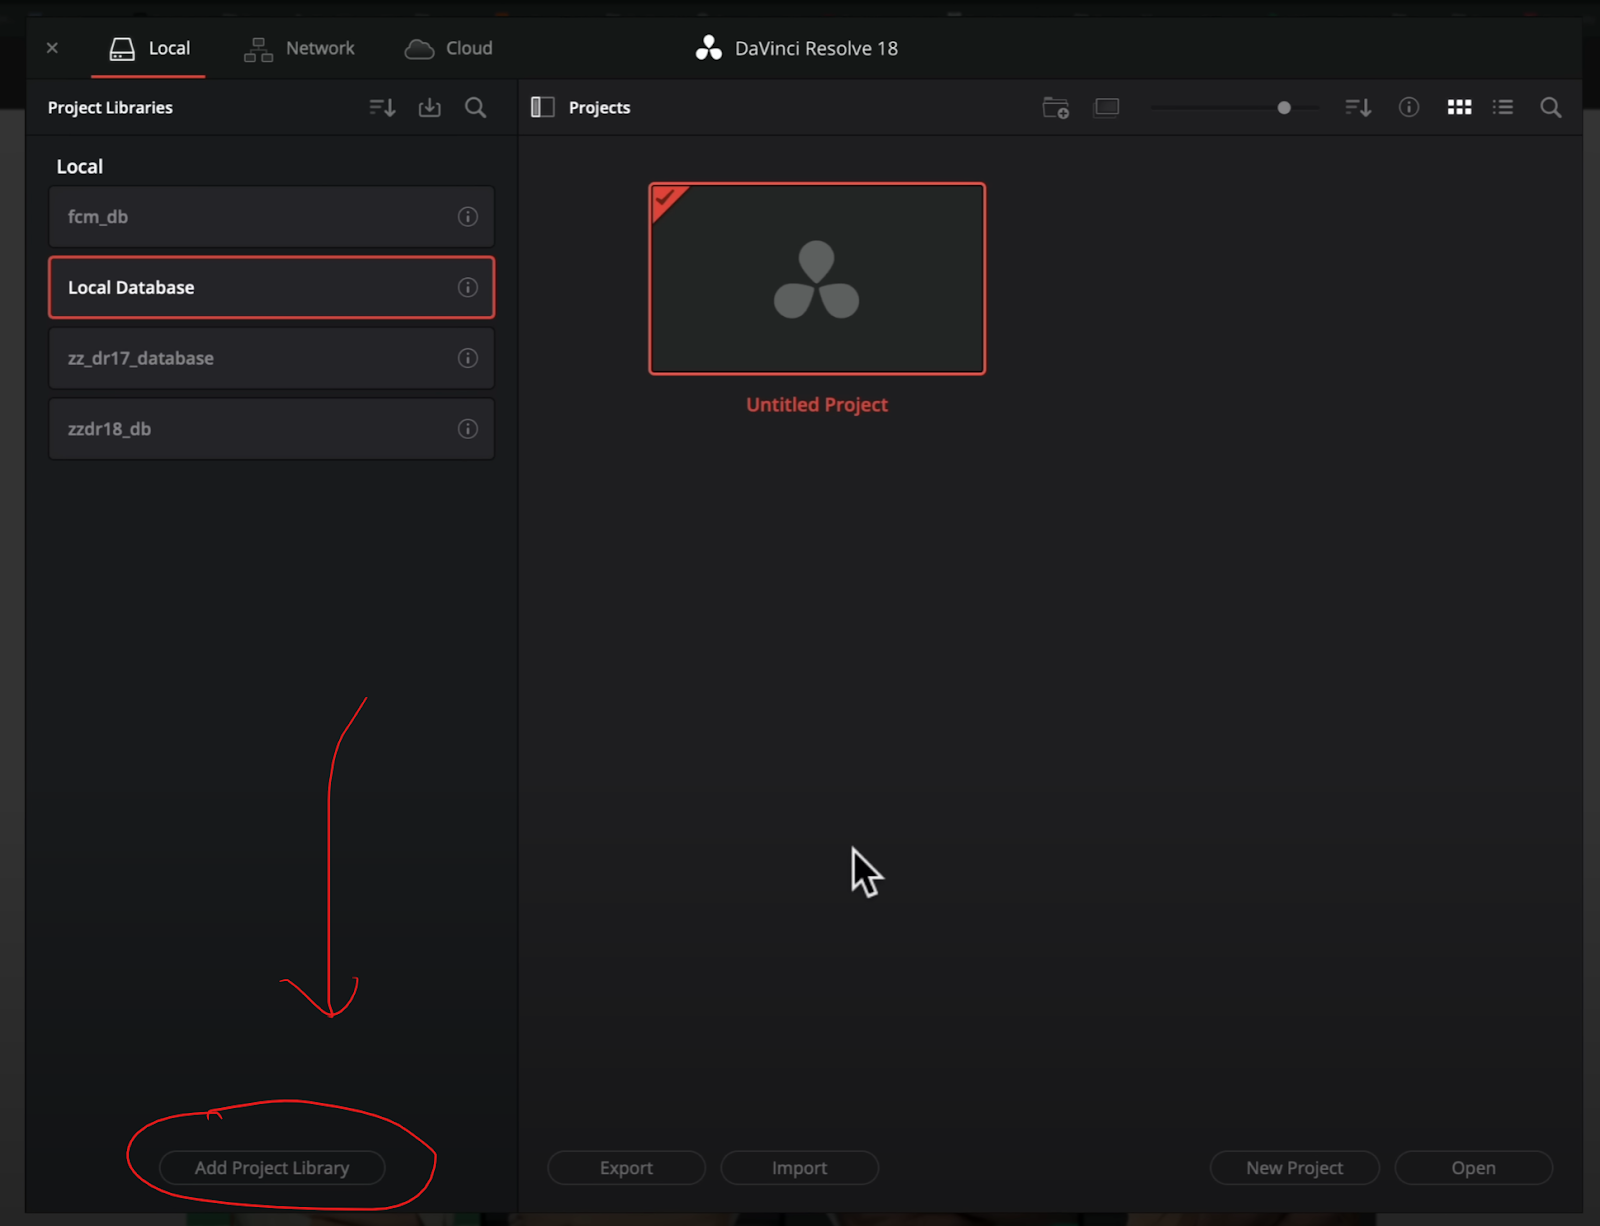
Once it is downloaded, we are going to open it and get started. When you first open it, you will see this. It’s the project database.

What you need to do is click on the little switch in the top left next to projects.

That will open the project libraries.

Now what you want to do, instead of using the local database, you want to click on add project library in the bottom left, which will prompt you to add a project library.

In this screen we can either connect or add a database. Assuming you’re going to create, once you type in the name and hit browse, you can pick where you want to store the database.
A quick word of advice, I would store this on a drive that is pretty fast because that will allow it to boot up and be accessed quickly.
Once you do all this, you can click create and it will create the database for you. Then you can just double tap to open a new project, and we will be inside Resolve.
Now we are inside Resolve and when you first open a project, it will look like this.

Now you will want to go over to the media page and the first thing we want to do is go under DaVinci Resolve in the top left, and select keyboard customization.


You are probably familiar with this from other programs, but this is the list of keyboard shortcuts. You can click on the top right and pick which layout you want. Then you can modify it and save a custom template.
Moving on, we are going to click on the preferences (under DaVinci Resolve at the top), and then we can set up our media storage locations and GPU configurations.

When selecting the media storage, you want to select a drive that is the fastest drive with the most storage.
Moving onto memory and GPU, we want to make sure that everything under here is set to auto. This allows Resolve to pick.

Under the user settings menu we are going to look at project save and load.

Here, if live save and project backups are not checked on, make sure to check them on. And, save your project backups in a separate place from where you save everything else because if that one drive you have everything on fails, you will still at least have your project backups somewhere else.
Now we are going to start talking about media settings and color management. You can find this in the gear icon in the bottom right. When you click on that, this is what you will see.

Now you don’t have to worry about anything but the working folders on there.

You want to make sure you select the fastest drive with most storage for these three folders.
Next we are going to talk about importing media and creating a new timeline. For this example we are just going to drag and drop our footage into the media pool. Once you do that, it’ll prompt you to change or not change the project frame rate to match the clip you brought in.

For this one I will hit change.
At this point, I can right click on the clip and select the “Create New Timeline Using Select Clips…”

That will prompt this box where you can name the timeline and change other settings if needed.

Now that we’ve created this timeline, you can see it in the edit page.

From here we need to discuss the project based color management. For this project we are going to set it up in ACES because of the show Dark. ACES is the golden standard. All of these big studios have contributed to it.

And once you start grading in this, your time will be cut in half with superior results.
To do this, we are going to click on our project settings and go under the color management tab.
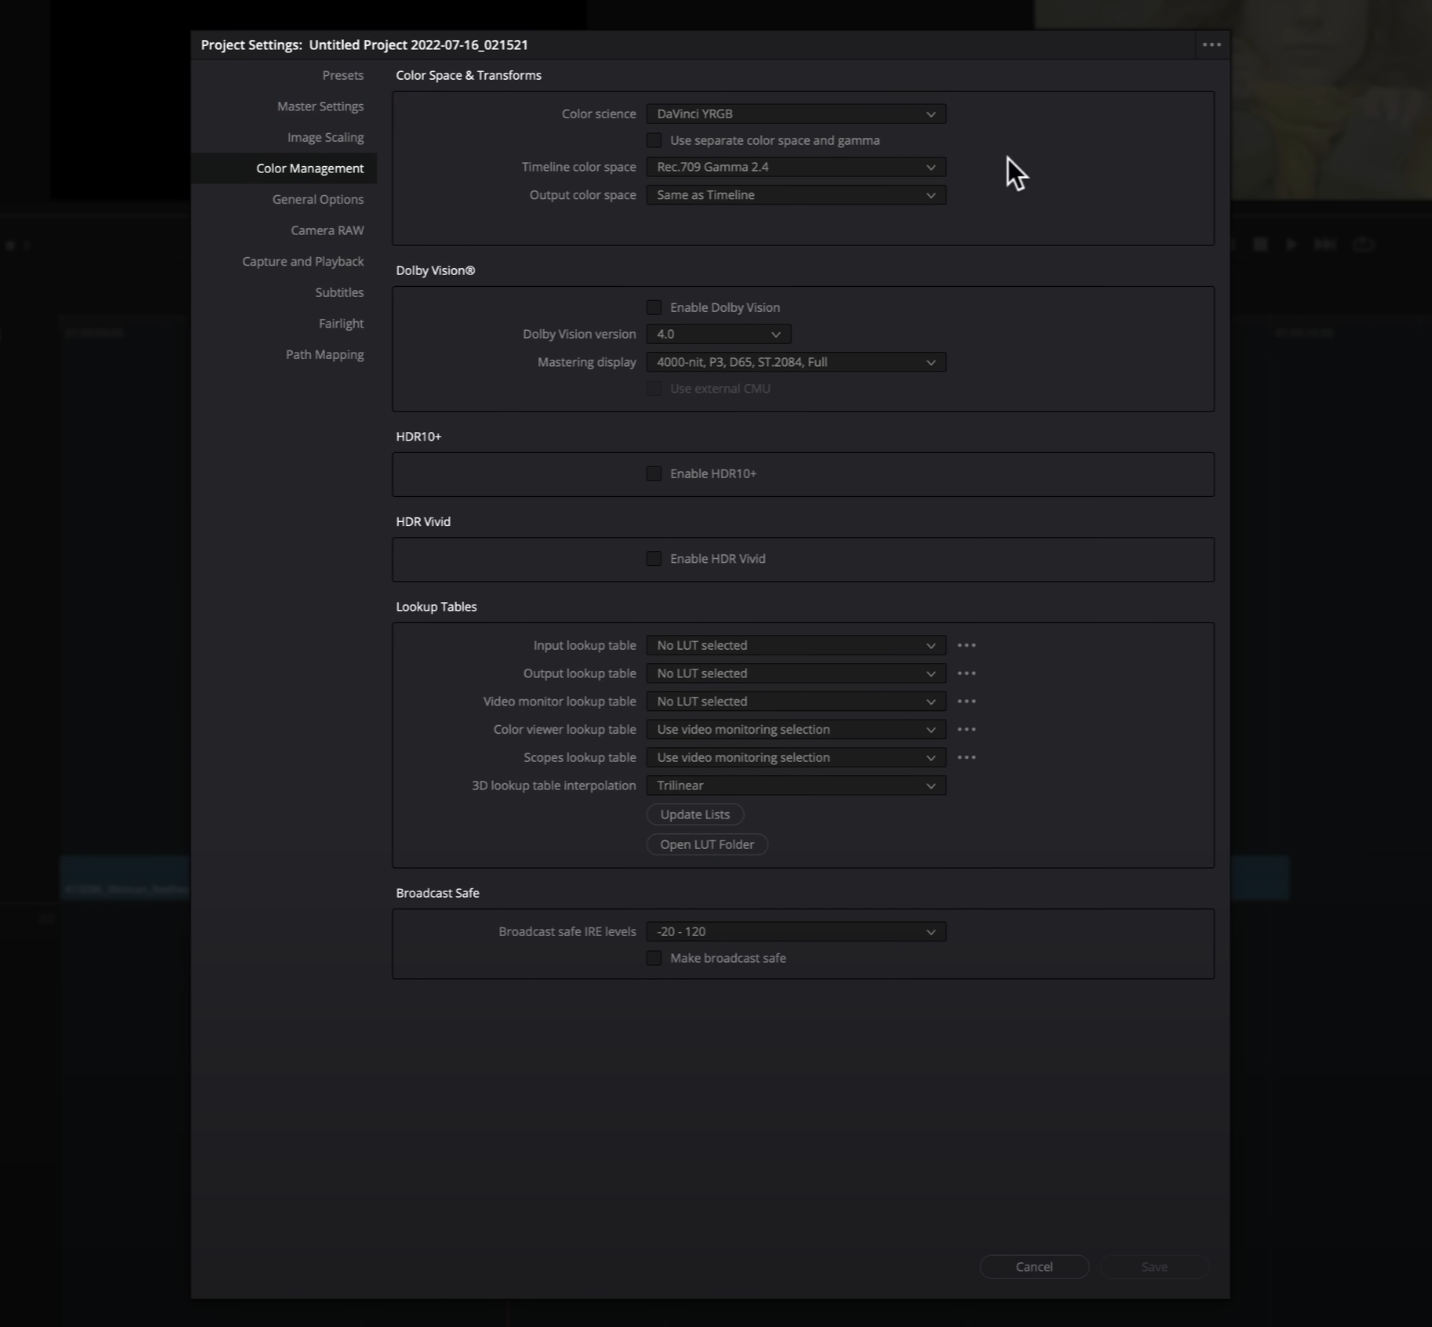
This is what you see by default, but we will be changing it – starting with our color science. We are going to select ACEScct. I also like leaving the ACES input transform to none because most of the time, people shoot with multiple different cameras and when you set it to one specific camera, it will create problems. For our output transform, this will be rec.709. Then make sure to check “use color space aware grading tools.”

Then you’ll click save and be ready to go.
Now let's do a color page overview.

So here we have a lot. The top left we have the LUTs/Gallery/Media Pool but you will mostly be using gallery/LUTs. In the middle next to the image we have our nodes, which is where most of the work will be done. Then on the far right we have our OFX (open effects). On the bottom left we have our primaries (color wheels, HDR palette, noise reduction, camera RAW) which is what you use the most. Then in the bottom middle we have our secondaries (Curves, color warper, qualifier, key output, power windows, tracker, etc.). Then the bottom right we have the scopes, keyframes, and metadata. Now you can get rid of the OFX and the galleries which opens up the amount of screen real estate you can have, which can help when it comes to a single screen.

Now let’s get into color grading. Because this is a beginner tutorial, I am going to keep this to the absolute essentials.
So let’s take a look at our shot.

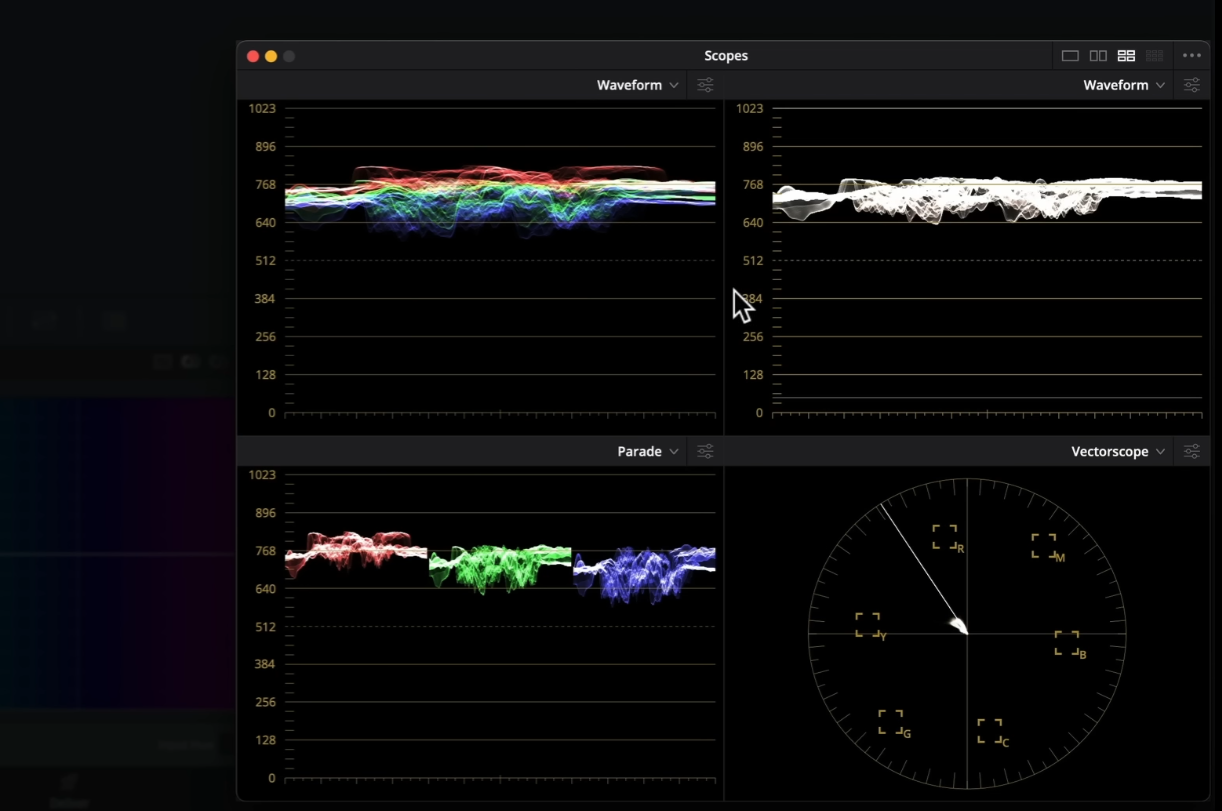
This looks awful. But before we get into transforming our shot properly, we want to expand our scopes using the little expander tool in the top of the scopes.

Now you can set up your scopes however you want, but I like to have the quad up.
Now we are going to clip on clips (up at the top right next to nodes), which will open up our clips in the middle and we want to right click and select our ACES input transform and select our camera (Sony SLOG_3).

Once I do that, here is what you get.

You still may think this doesn’t look right, but I would disagree because this is properly transformed. It was just shot overexposed. The rule with shooting digitally is to expose to the right. So everything looks overexposed, but with the magic of ACES we are going to be able to bring that in perfectly.
To do that, we are going to use three nodes.

Now we are going to start in our primaries, starting with HDR because the global offset works exactly how the exposure works in the camera. So we would say this is maybe two stops overexposed, so what I will do is click on the global exposure and drag it down to where it looks good.


Then I am going to go into my curves node and crank up the contrast a bit.


Then going back to my primaries, I want to remove this warmth. To do that I am going to use my offset and start pulling it around until it starts to look somewhat normal.


Then I want to take my lift and pull it down a touch, then bring my gain up a little bit.

Now under the secondaries node, I am going to create a circular window and position it and size it to what I want. Then I want to feather it out.


Then I am going to hit shift + H to see what all it is selecting.

I then want to invert the window so I can affect the outside of it, and I want to make it a bit bigger.

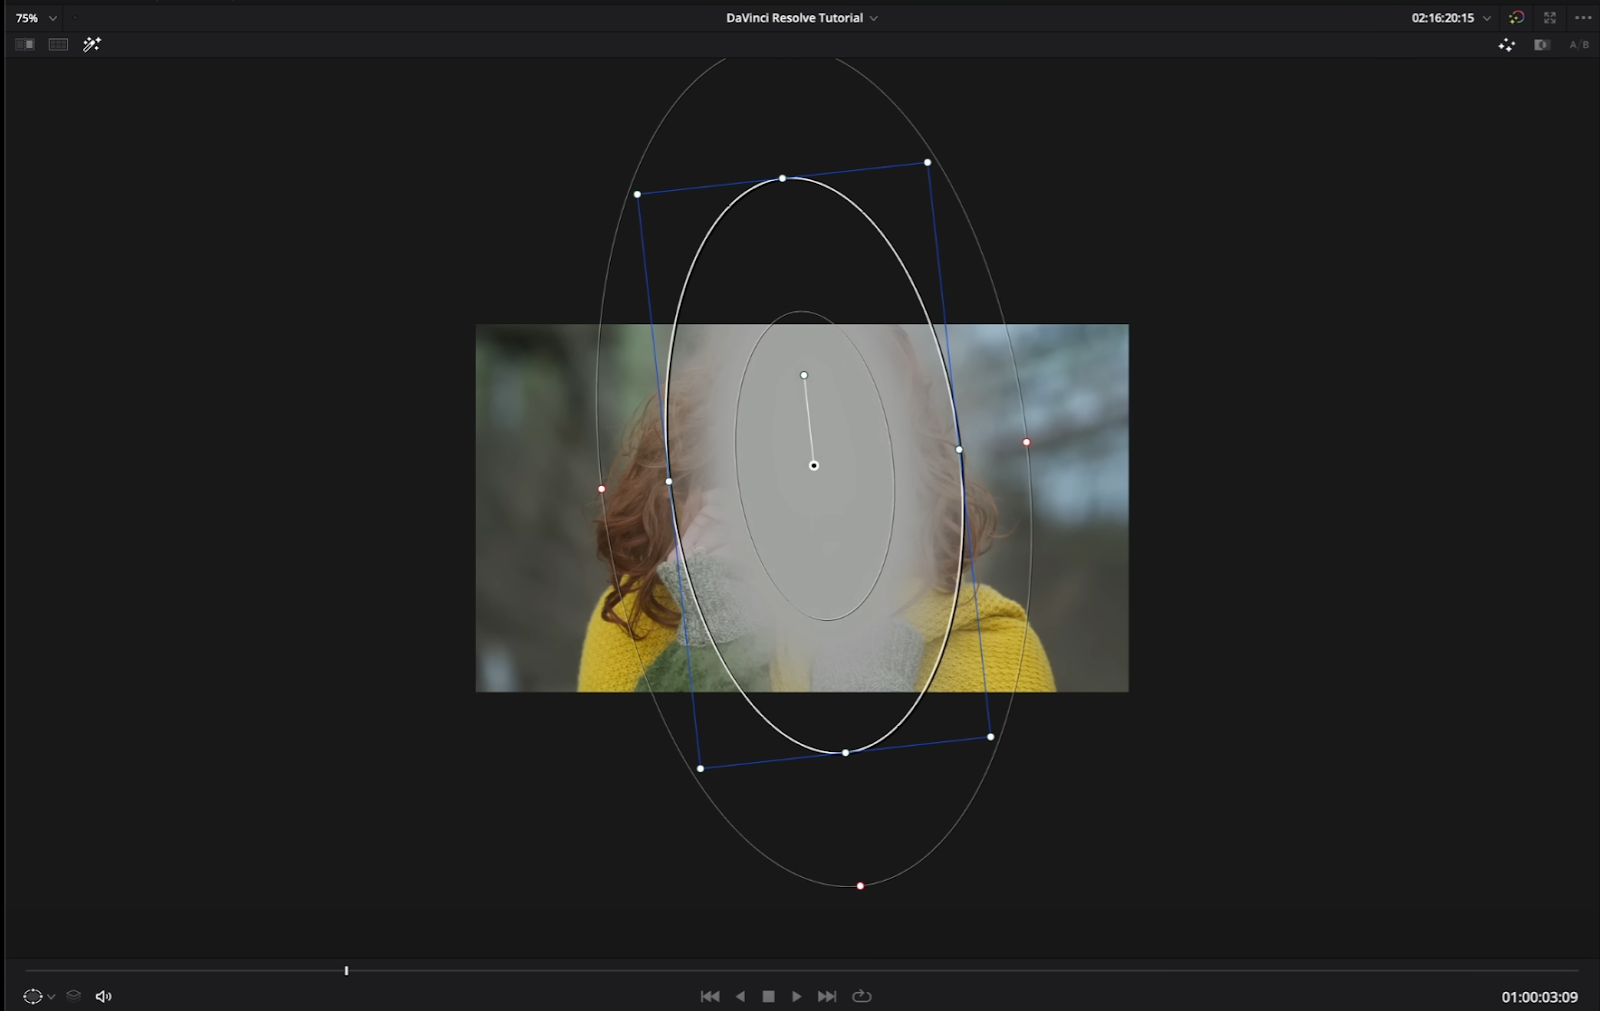
Then to get out of the highlight mode I will hit shift + H again and start taking my gamma down.


We are done with it now. It looks way better than before. And the reason I wanted to build a node tree like this was because it is repeatable and simple. So let’s quickly look at the before and after.


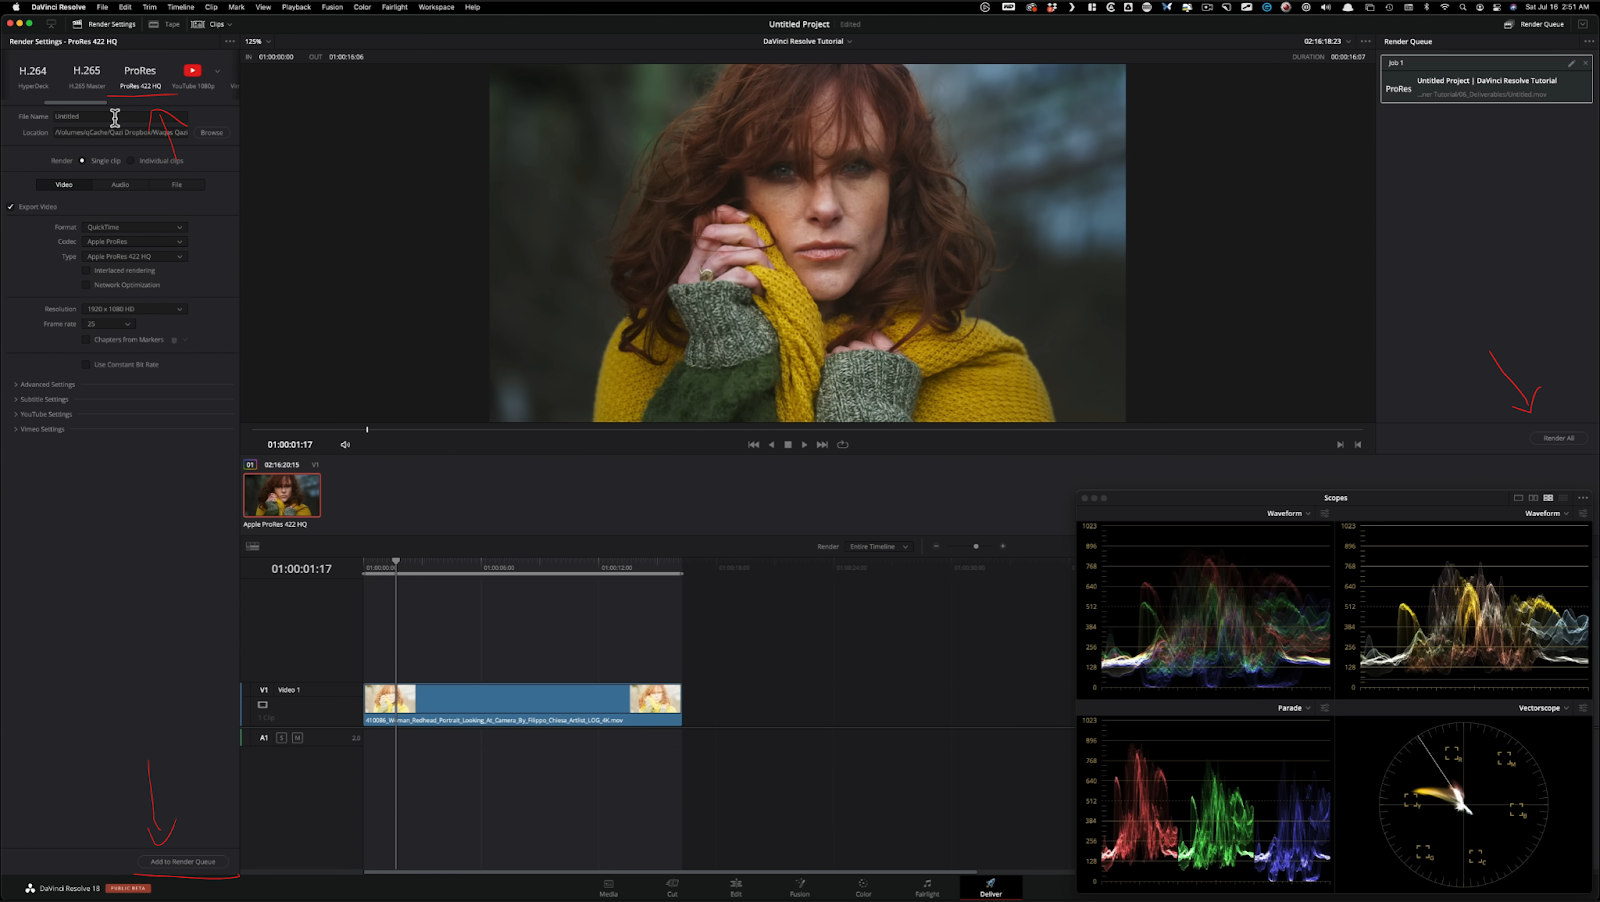
Now let’s jump into our deliver page and export the video. All you have to do is use the presets as a starting point. Or if you want to export a master with the highest quality you can select ProRes 422 HQ and change the settings. Then you will add that to the render que, and then hit render.
There you go. It’s a quick and easy overview on how to make your footage sing. Now remember, work hard, get obsessed and get possessed. I will see you in the next one.
MORE LIKE THIS


